Time for part II of our island adventure - the renovation! I’m warning you, this post is LONG, but if you thought the buying process was crazy, we now know it pales in comparison to planning a home renovation from 1,100 miles away, and then completing said renovation in 2 weeks.

Daytime view from the deck
RENOVATION PLANNING
To rewind a bit, when we inspected the home in October of 2020, we decided that a renovation was in order even sooner than we expected. Initially, we thought we would wait about a year to to give us time to plan and have a better understanding of what we wanted to do, but once we lived in the space for 5 days, we realized the kitchen was way too small, the cabinets were falling apart, the oven barely worked and the white tile floor with red grout was just too much for my eyes to bear. So, we reworked our game plan, measured up the entire house and agreed to start the renovation pretty quickly after we closed.

Kitchen BEFORE
Fast forward to May of 2021 when Tom and I went down for the closing - this is when we decided we would plan another trip for the end of July so we could start the renovation. Perhaps this timeline was a bit agressive, but we were pretty sure we could make it happen.
While we were there, we also took inventory of what the previous owners left and realized we were pretty much going to have to start from scratch on everything except for the kitchen cups, plates and utensils. There was a lot of furniture in the house, but none of it had any storage and it was all dated and worn.
We also planned on verifying all the measurements while we were there because it had been 7 months since we took them, but we had so much else to do in a few short days, we never got around to it. Let’s just say this definitely came back to bite us, but more on that later . . .
Figuring out how to optimize floor plans is one of my favorite aspects of being a designer and since I’m used to drawing houses that are 5,000+ square feet, I thought this little place would be a breeze. Well, I was wrong. The thing with small houses is EVERY INCH counts and I knew I had to not only optimize storage, but the layout as well. I’ll admit though, this challenge is part of what really excited me about the house. I’m pretty passionate about living simply - I really dislike clutter and do my best to live with as little “stuff” as possible, so only having 800 square feet to work with meant I not only needed to simplify what we kept in the house, but I had to be very strategic about cabinetry, storage and furniture selections. After hours upon hours of reworking, I finally landed on what felt like the best layout for us which consisted of removing the wall between the kitchen and living area to create an open concept and make the space feel larger. The plan also included vaulting the kitchen ceiling and removing an existing window so I could change the orientation of the space. Doing this allowed me to add a small dishwasher, a full size range (the old one was really small) and an island for extra seating and storage.

OLD Kitchen Layout

NEW Kitchen Layout
With the layout locked and an agreed upon renovation timeline, once we got back to the States I started sourcing everything we needed.
Our timeline (just over 2 months to design, source and have everything on the island), meant I didn’t have the endless custom options that I’m used to, so I had to make a lot of decisions and compromises based upon what was actually available. Pre-COVID, this wouldn’t have been a huge deal, but with most things being backordered right now, combined with the fact that I needed very specific sizes and specs (i.e., a 32” counter depth fridge with a left hinge, 18” dishwasher, a liquid propane compatible range, etc), it’s pretty safe to say I spent countless evenings and weekends searching. In many cases I had to select something that wouldn’t have been my first choice design-wise, in other cases it meant we paid a lot more for something because the higher end option was the only one available to ship in time. For example, I spent a solid 4 hours one Sunday ordering kitchen cabinets just to receive an email Monday morning saying production of the line I ordered had been “suspended” and I was going to have to switch to a more expensive line of cabinets in order to get all the sizes I was needing. Not optimal, but I was grateful there was an alternative that would work. Except, as it turns out the alternative line didn’t have all of the exact cabinets I needed either, so that meant I had to mix and match with another cabinet line to get all the pieces and parts.
Once I finally had materials and appliances figured out, I had to find a freight forwarder. The freight forwarder is who you ship everything to, then they consolidate/ hold your items until you are ready for them to ship out. Again, sounds simple - and by no means does the process take a PhD to figure out, BUT I will say, it is very tedious and time consuming because once the forwarder receives your stuff, you need to provide them with invoices for every single item. You also have to keep track of when everything will be arriving to them, and when it needs to ship out. Honestly, if you’re just ordering a few items, this process really isn’t a big deal, but we weren’t ordering just a few items. Our list consisted of pretty much every tool you need to build a house, nails, screws, electrical wire, flooring, cabinets, countertops, faucets, light fixtures, dishwasher, range, microwave, refrigerator, sink, shelving, a sectional, bedding, a vacuum (or 2…haha), outdoor storage sheds . . the list goes on.
Unfortunately, there isn’t an ‘Island Freight Forwarding Book For Dummies’, and Google wasn’t much help either. So, after a lot of emails and calls to the freight forwarder with countless questions, I finally felt like I had a handle on the process (or at least I knew enough to be dangerous). However, getting your materials to the island is only half the battle. Once everything is there, it needs to clear customs and you have to pay VAT and duty on the items you’ve shipped in, before you can take possession. This meant we needed to find a customs broker on the island because everything has a different rate of tax applied to it based upon how it’s categorized and with the volume of items we had coming in (not to mention this was our first international freight rodeo), there was no way I was going to try and tackle this on my own. So, we contacted a local customs broker that received all of our items when they came in on the vessel and he filed the paperwork with Customs on our behalf.

Sunset view from the deck
The freight forwarder ships into Governors Harbour once a week, so we had as much as possible arrive the Friday before our Monday arrival, otherwise we would have been there for a week without the materials we needed to begin construction. That being said, even though I had spent hours creating spreadsheets and documents to try and keep everything organized (really I was just trying to maintain some sort of control over what felt like a runaway train), I had no clue what actually made it out on the first boat.
The lack of control is what truly made this entire experience so interesting. As you know, Tom and I plan out renovation timelines, budgets and materials daily, but this was the first time we literally had ZERO control over not only what was actually going to show up, but when it would show up, what condition it was going to show up in and exactly what it would cost. What if the cabinets didn’t come in until the last week we were there, or what if the refrigerator showed up with a huge dent in the front, or worse yet, didn’t work? You can’t exactly call Lowes to come pick it up or send out a repairman and although there are small hardware stores on the island, there’s no guarantee they’re going to have the exact part or tool you need. There were so many unknowns that I had to keep myself from overthinking any given scenario or else I would have lost my mind. I honestly can’t tell you how many times while Tom and I were planning for the renovation we had to remind ourselves something WILL go wrong. We agreed we would just need to roll with the punches and use our expertise to find creative solutions to the challenges we were presented with.
So, after 2 very intense months of trying to think of every tool and material we MIGHT need along with planning for every possible scenario and coordinating what felt like a million moving parts, on Monday, July 26th at 12PM we landed in North Eleuthera, grabbed my parents who came in on the flight after us, and began the renovation adventure of a lifetime.


THE RENOVATION
When we arrived to the house we gave my parents the 2 min tour and I quickly snapped a few “before” pictures because with such an aggressive construction schedule, I knew it wouldn’t be long before Tom started tearing into things.
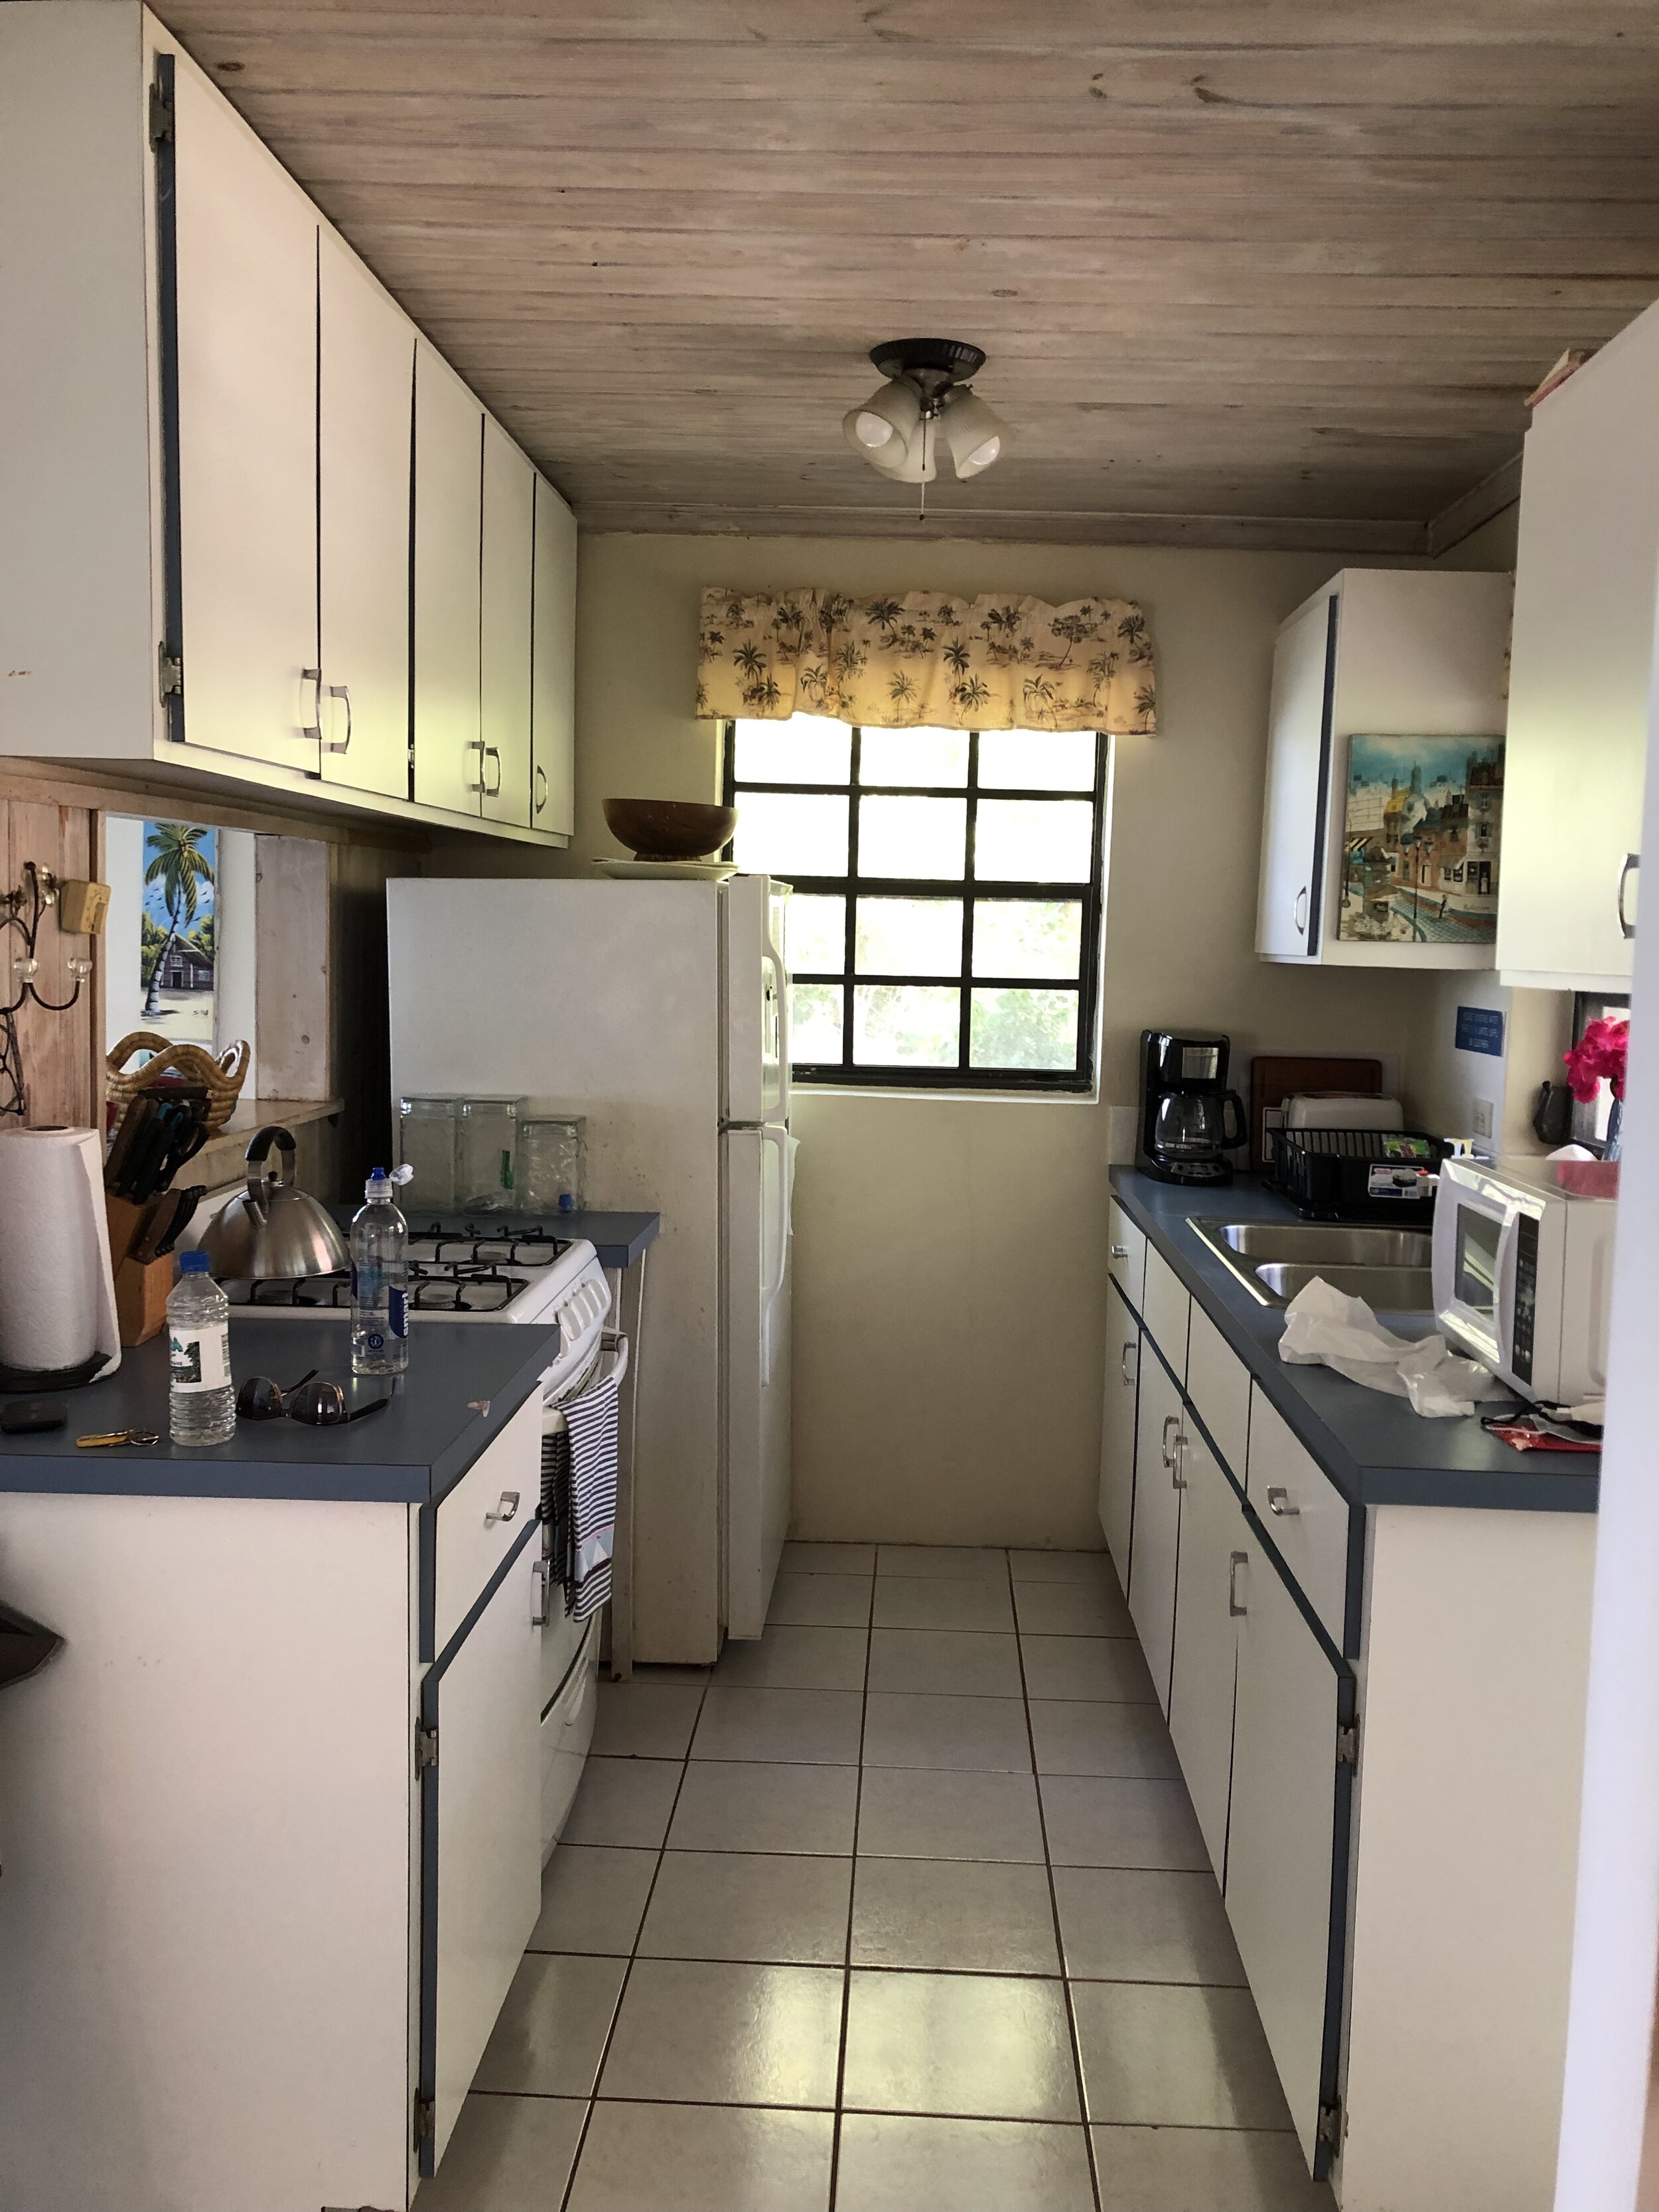
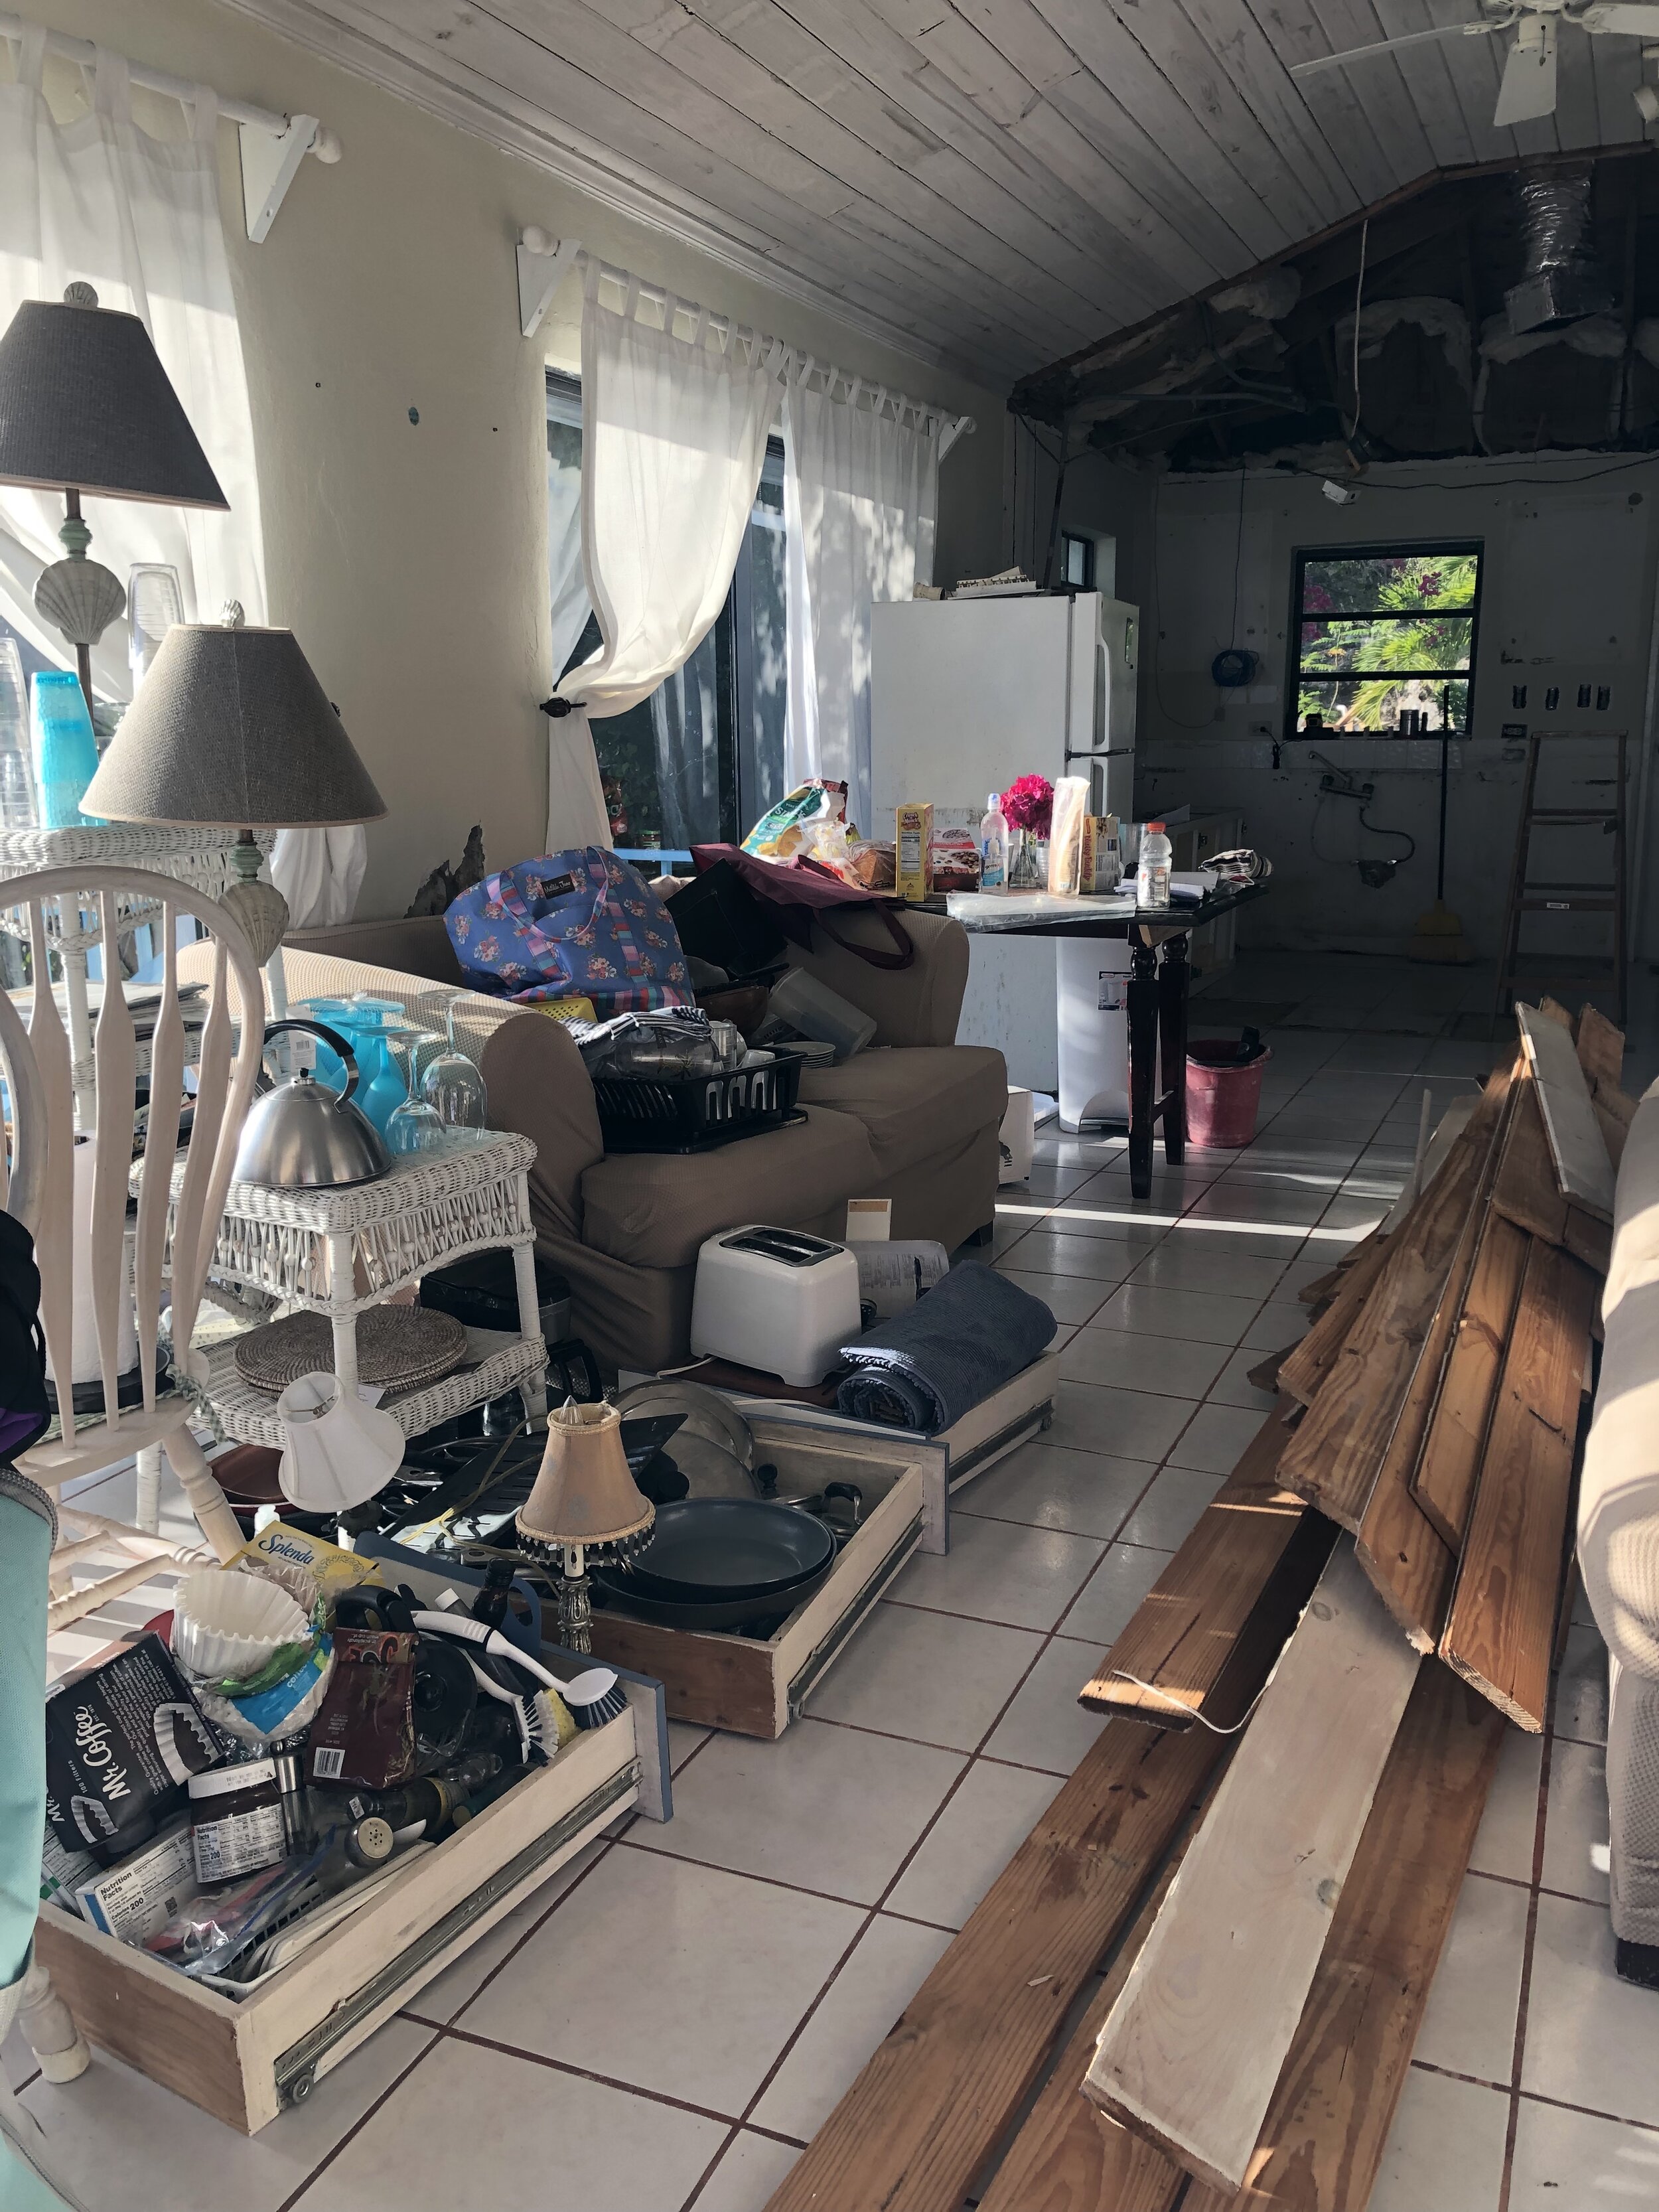
Kitchen BEFORE with zero counter space

Living and Dining BEFORE
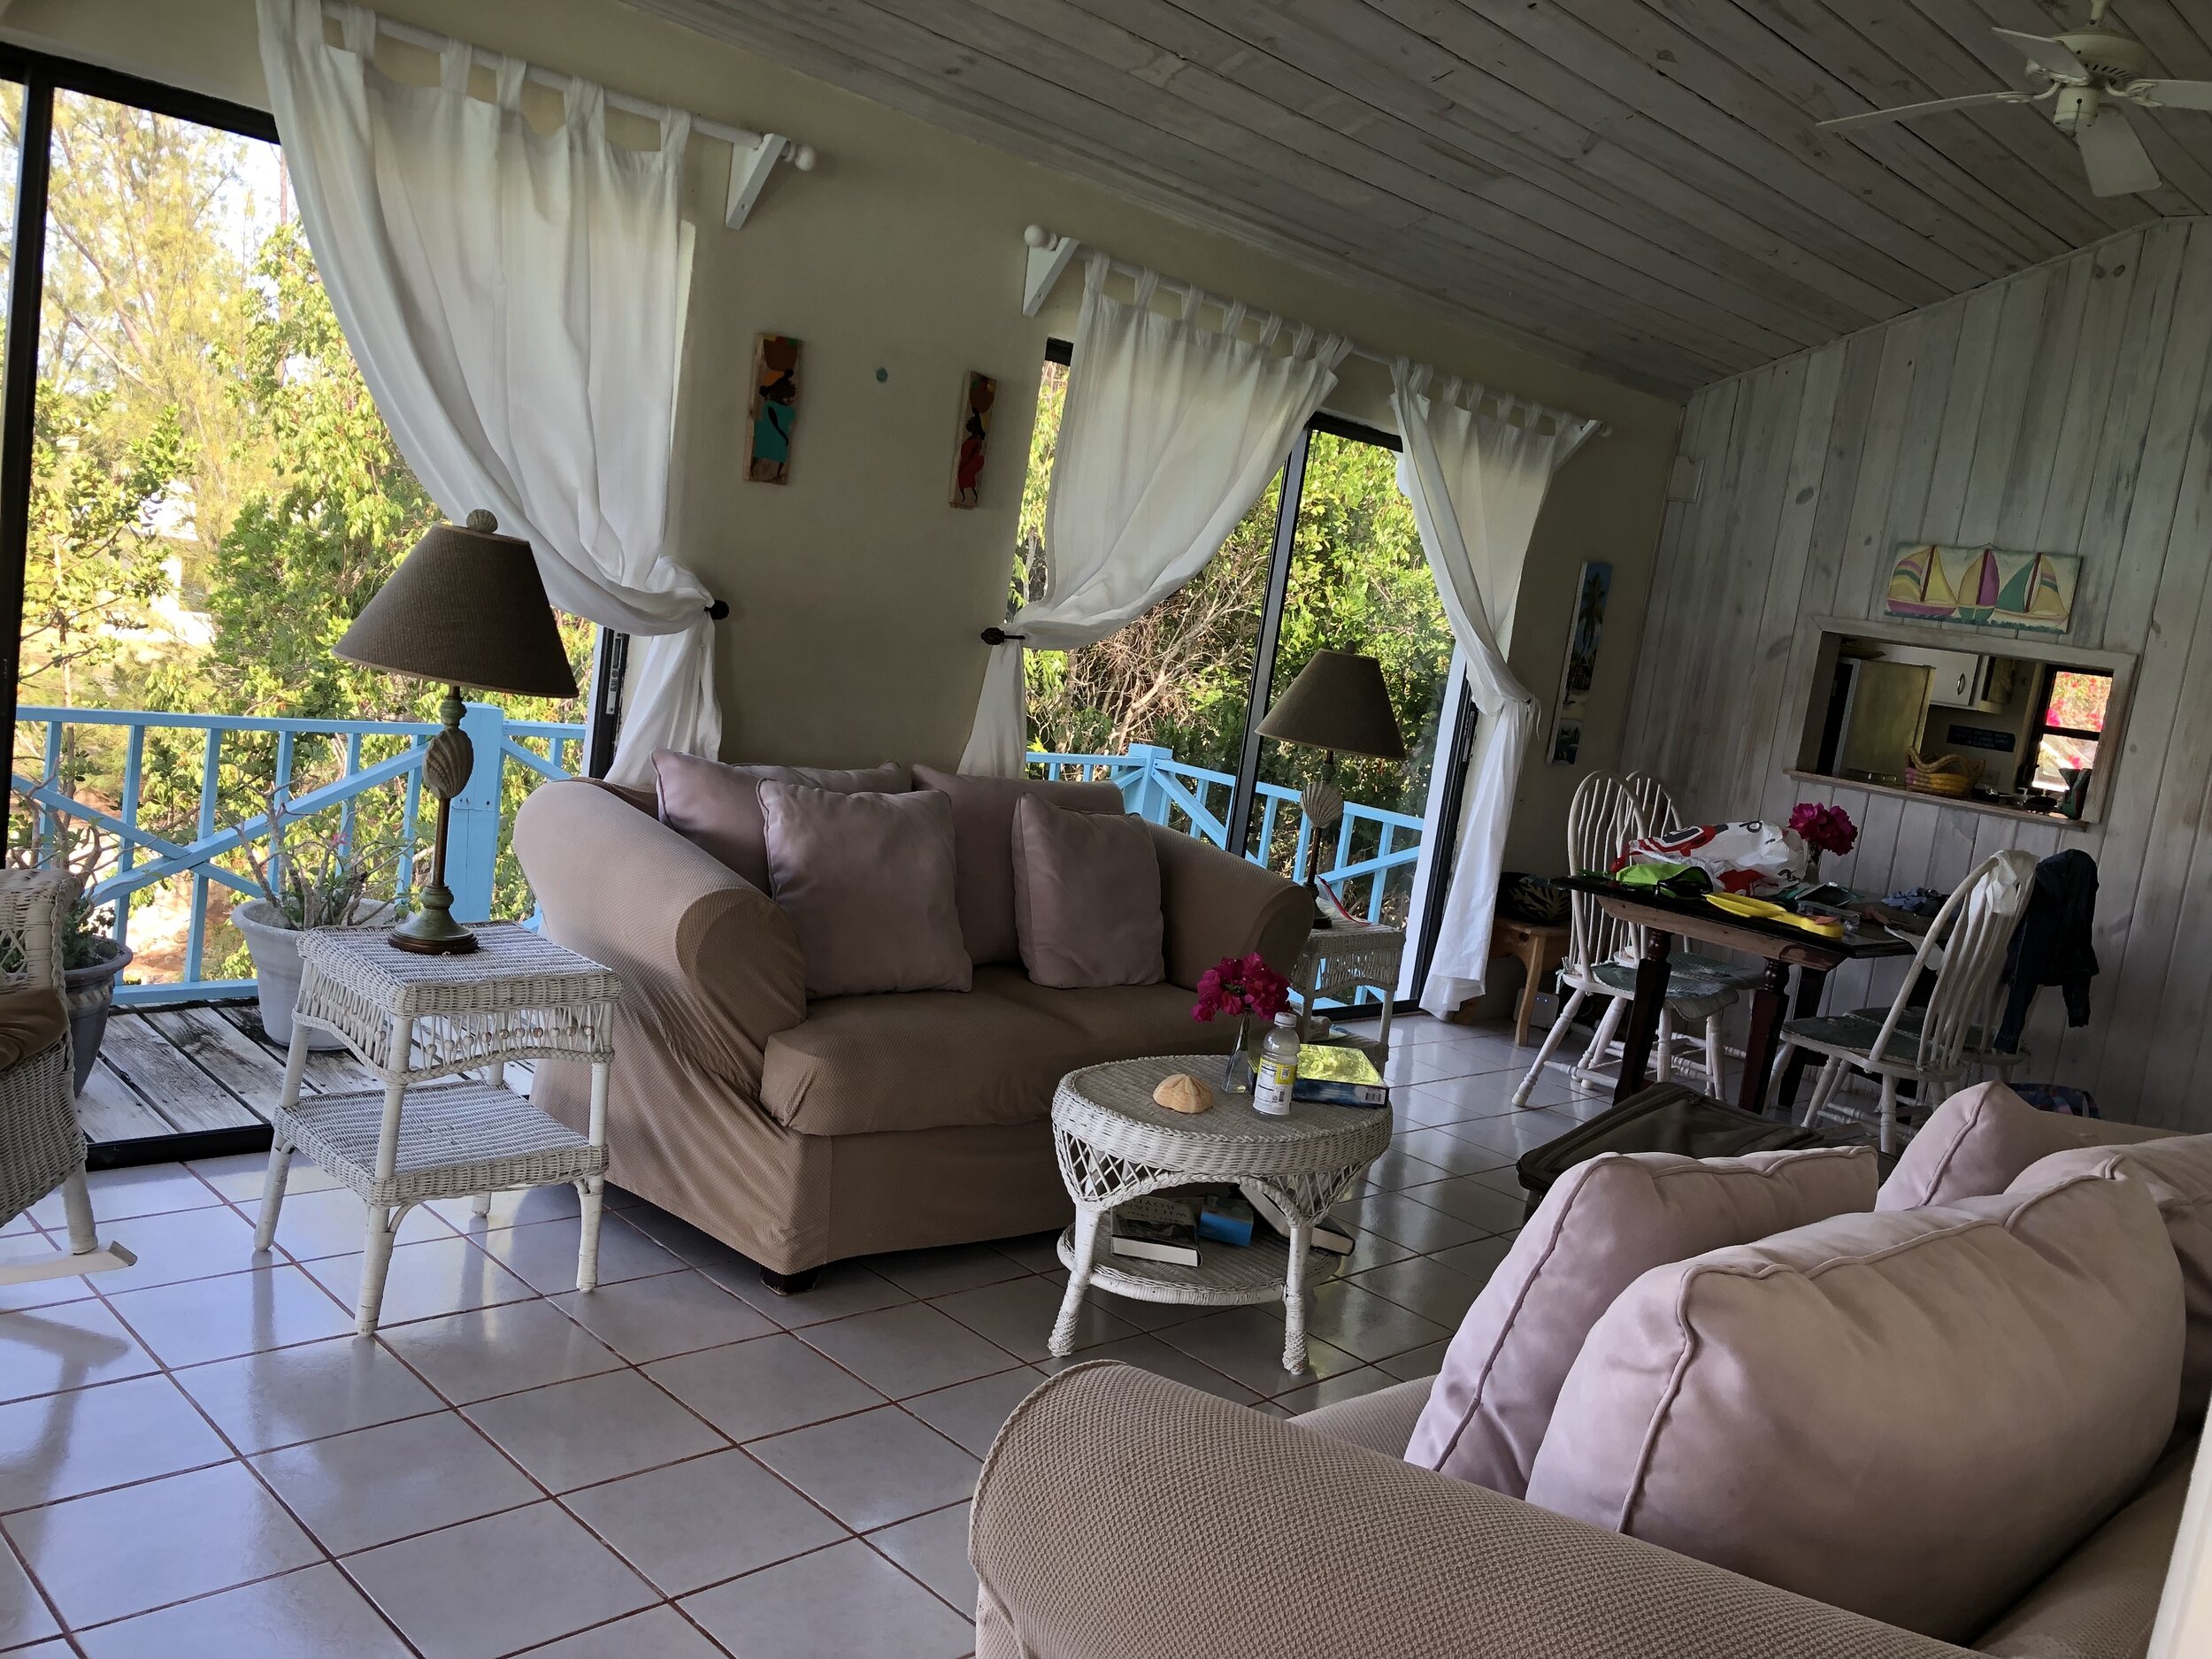
Living BEFORE
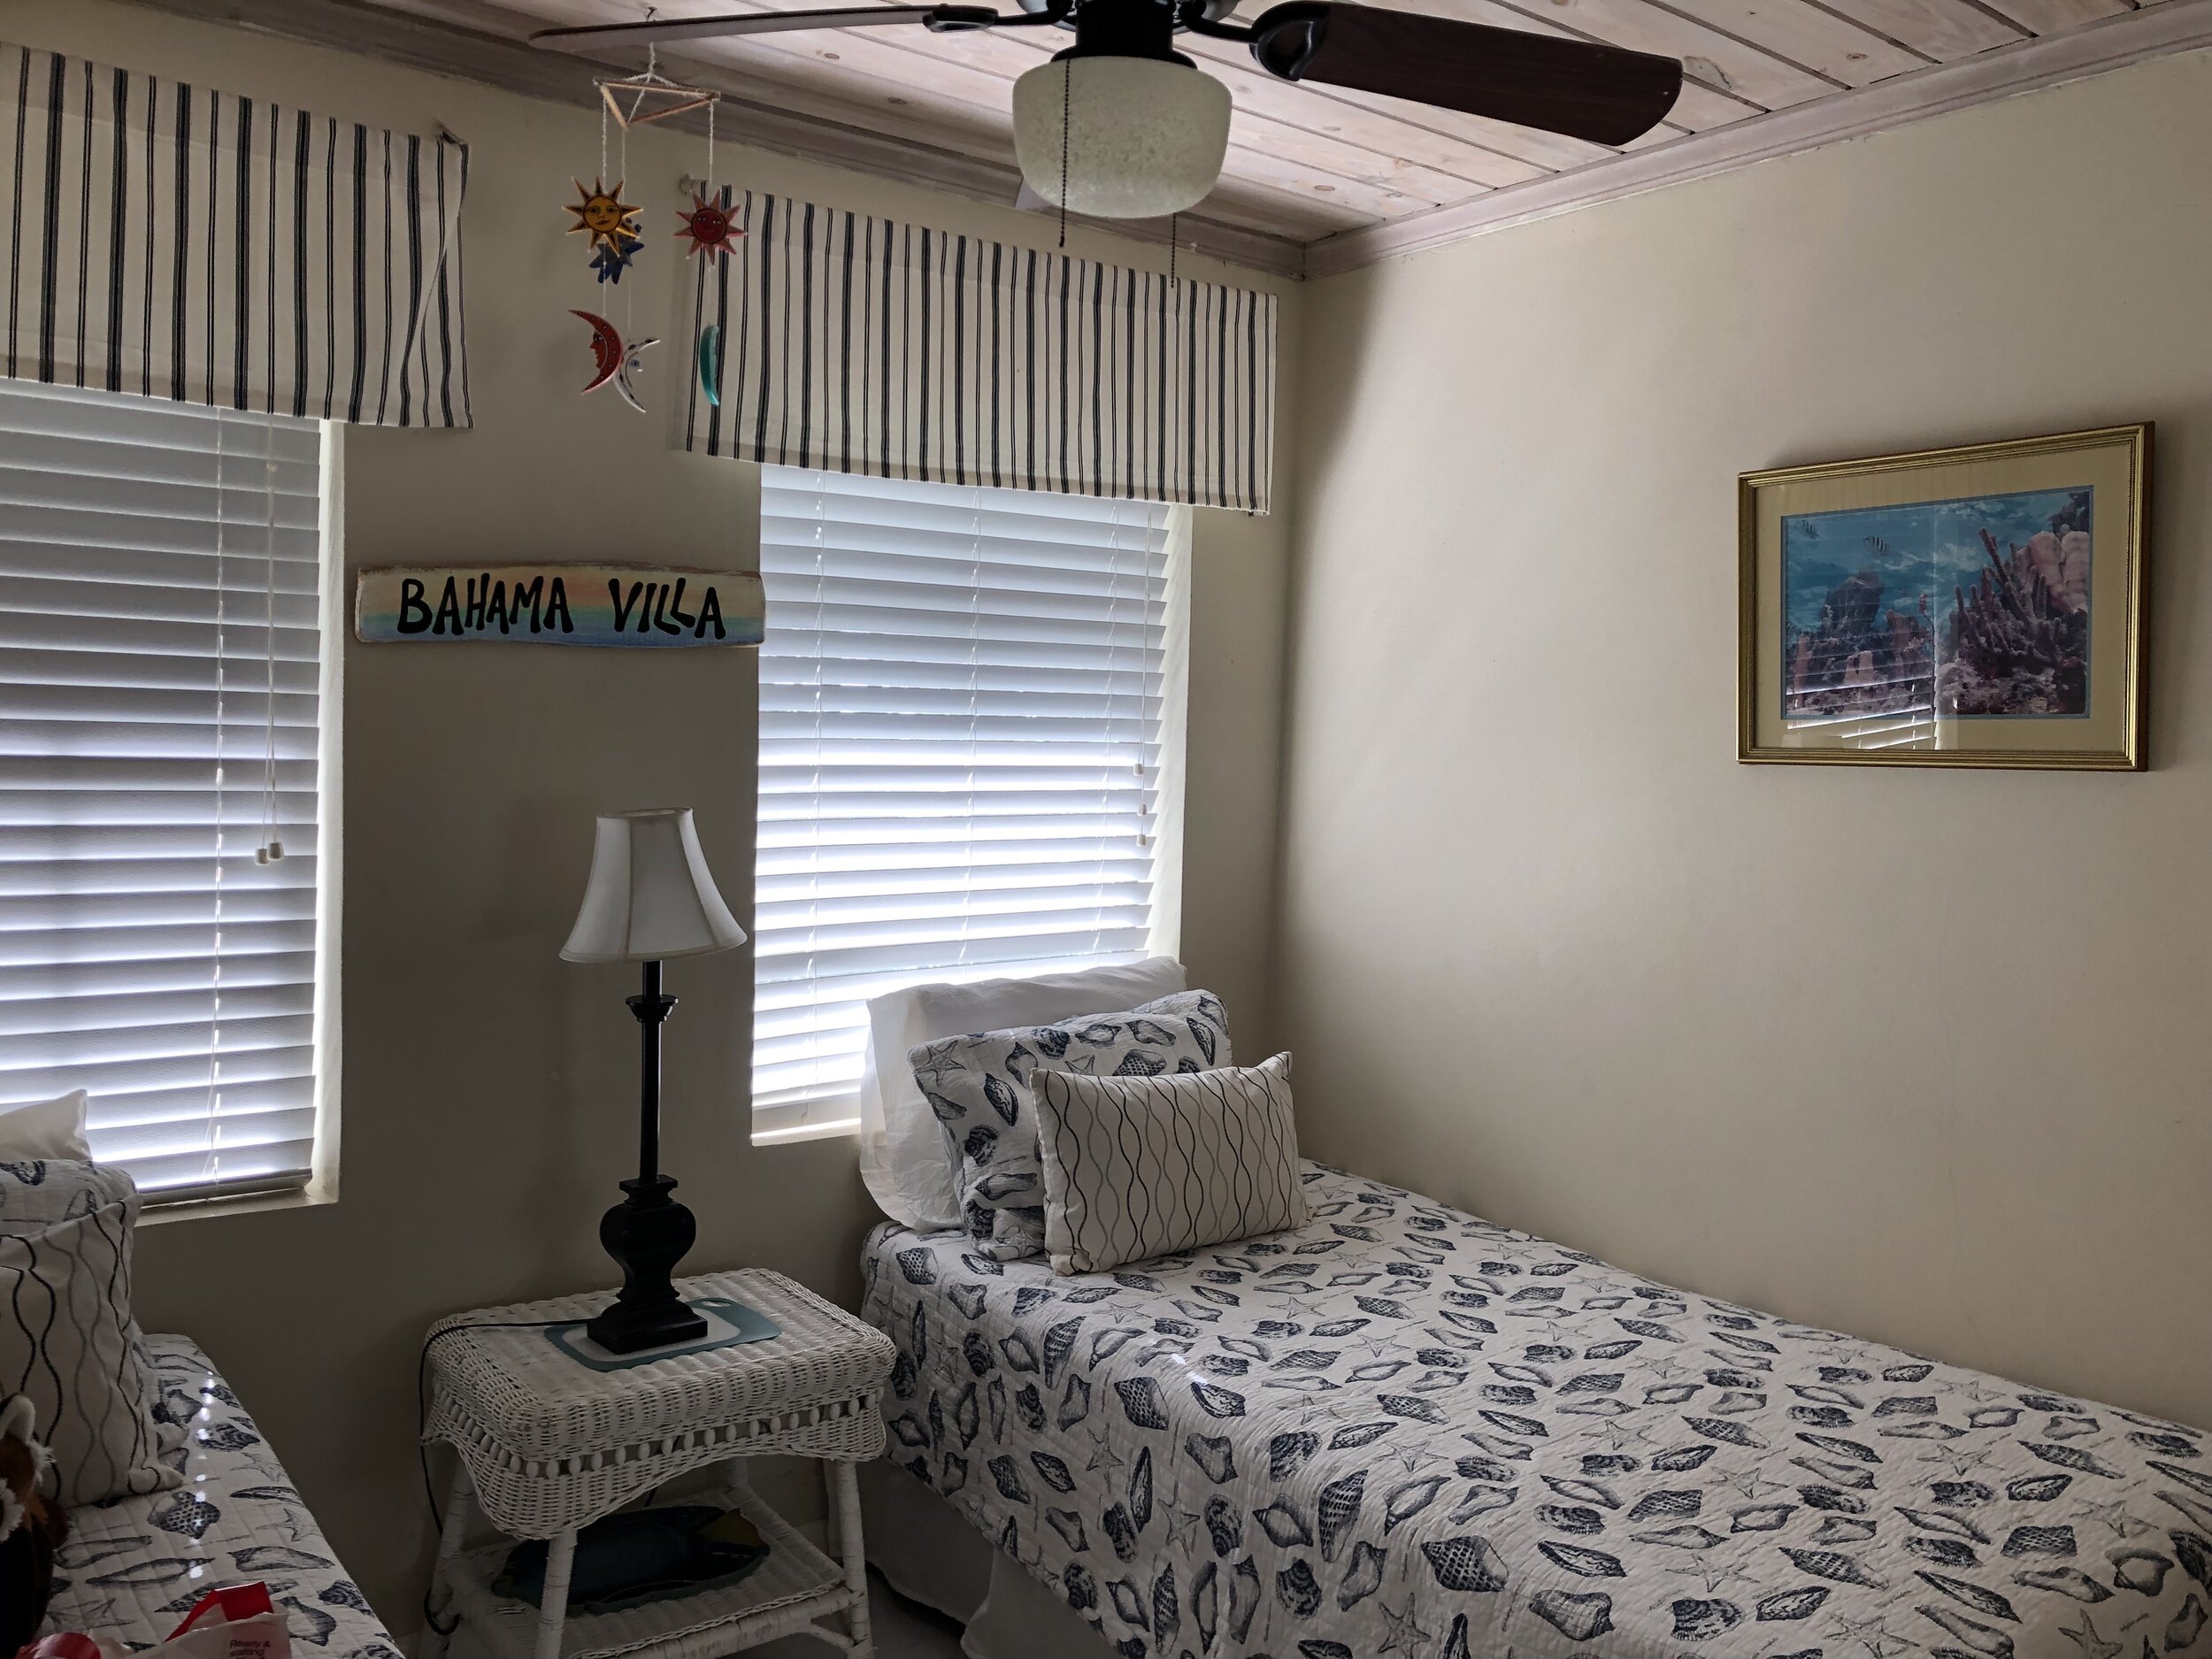
Kids Room BEFORE
In 14 days, we planned to remove and block in a window, remove the wall in between the kitchen and living area, remove the kitchen ceiling and vault it to match the living area, add insulation, lace in the ceiling with pecky cypress from the wall and ceiling we removed, move the gas line, re-do the wiring, add can lights, replace the ceiling fans, install new flooring throughout the entire house, assemble and install new cabinets, appliances, sink, garbage disposal and countertops, replace the old rotting outdoor storage box with new outdoor storage and paint all of the walls and trim. It was a tall order for a short amount of time and SO many unknowns.
The next day Tom and my Dad moved everything out of the kitchen and removed the ceiling and wall in between the kitchen and living area.
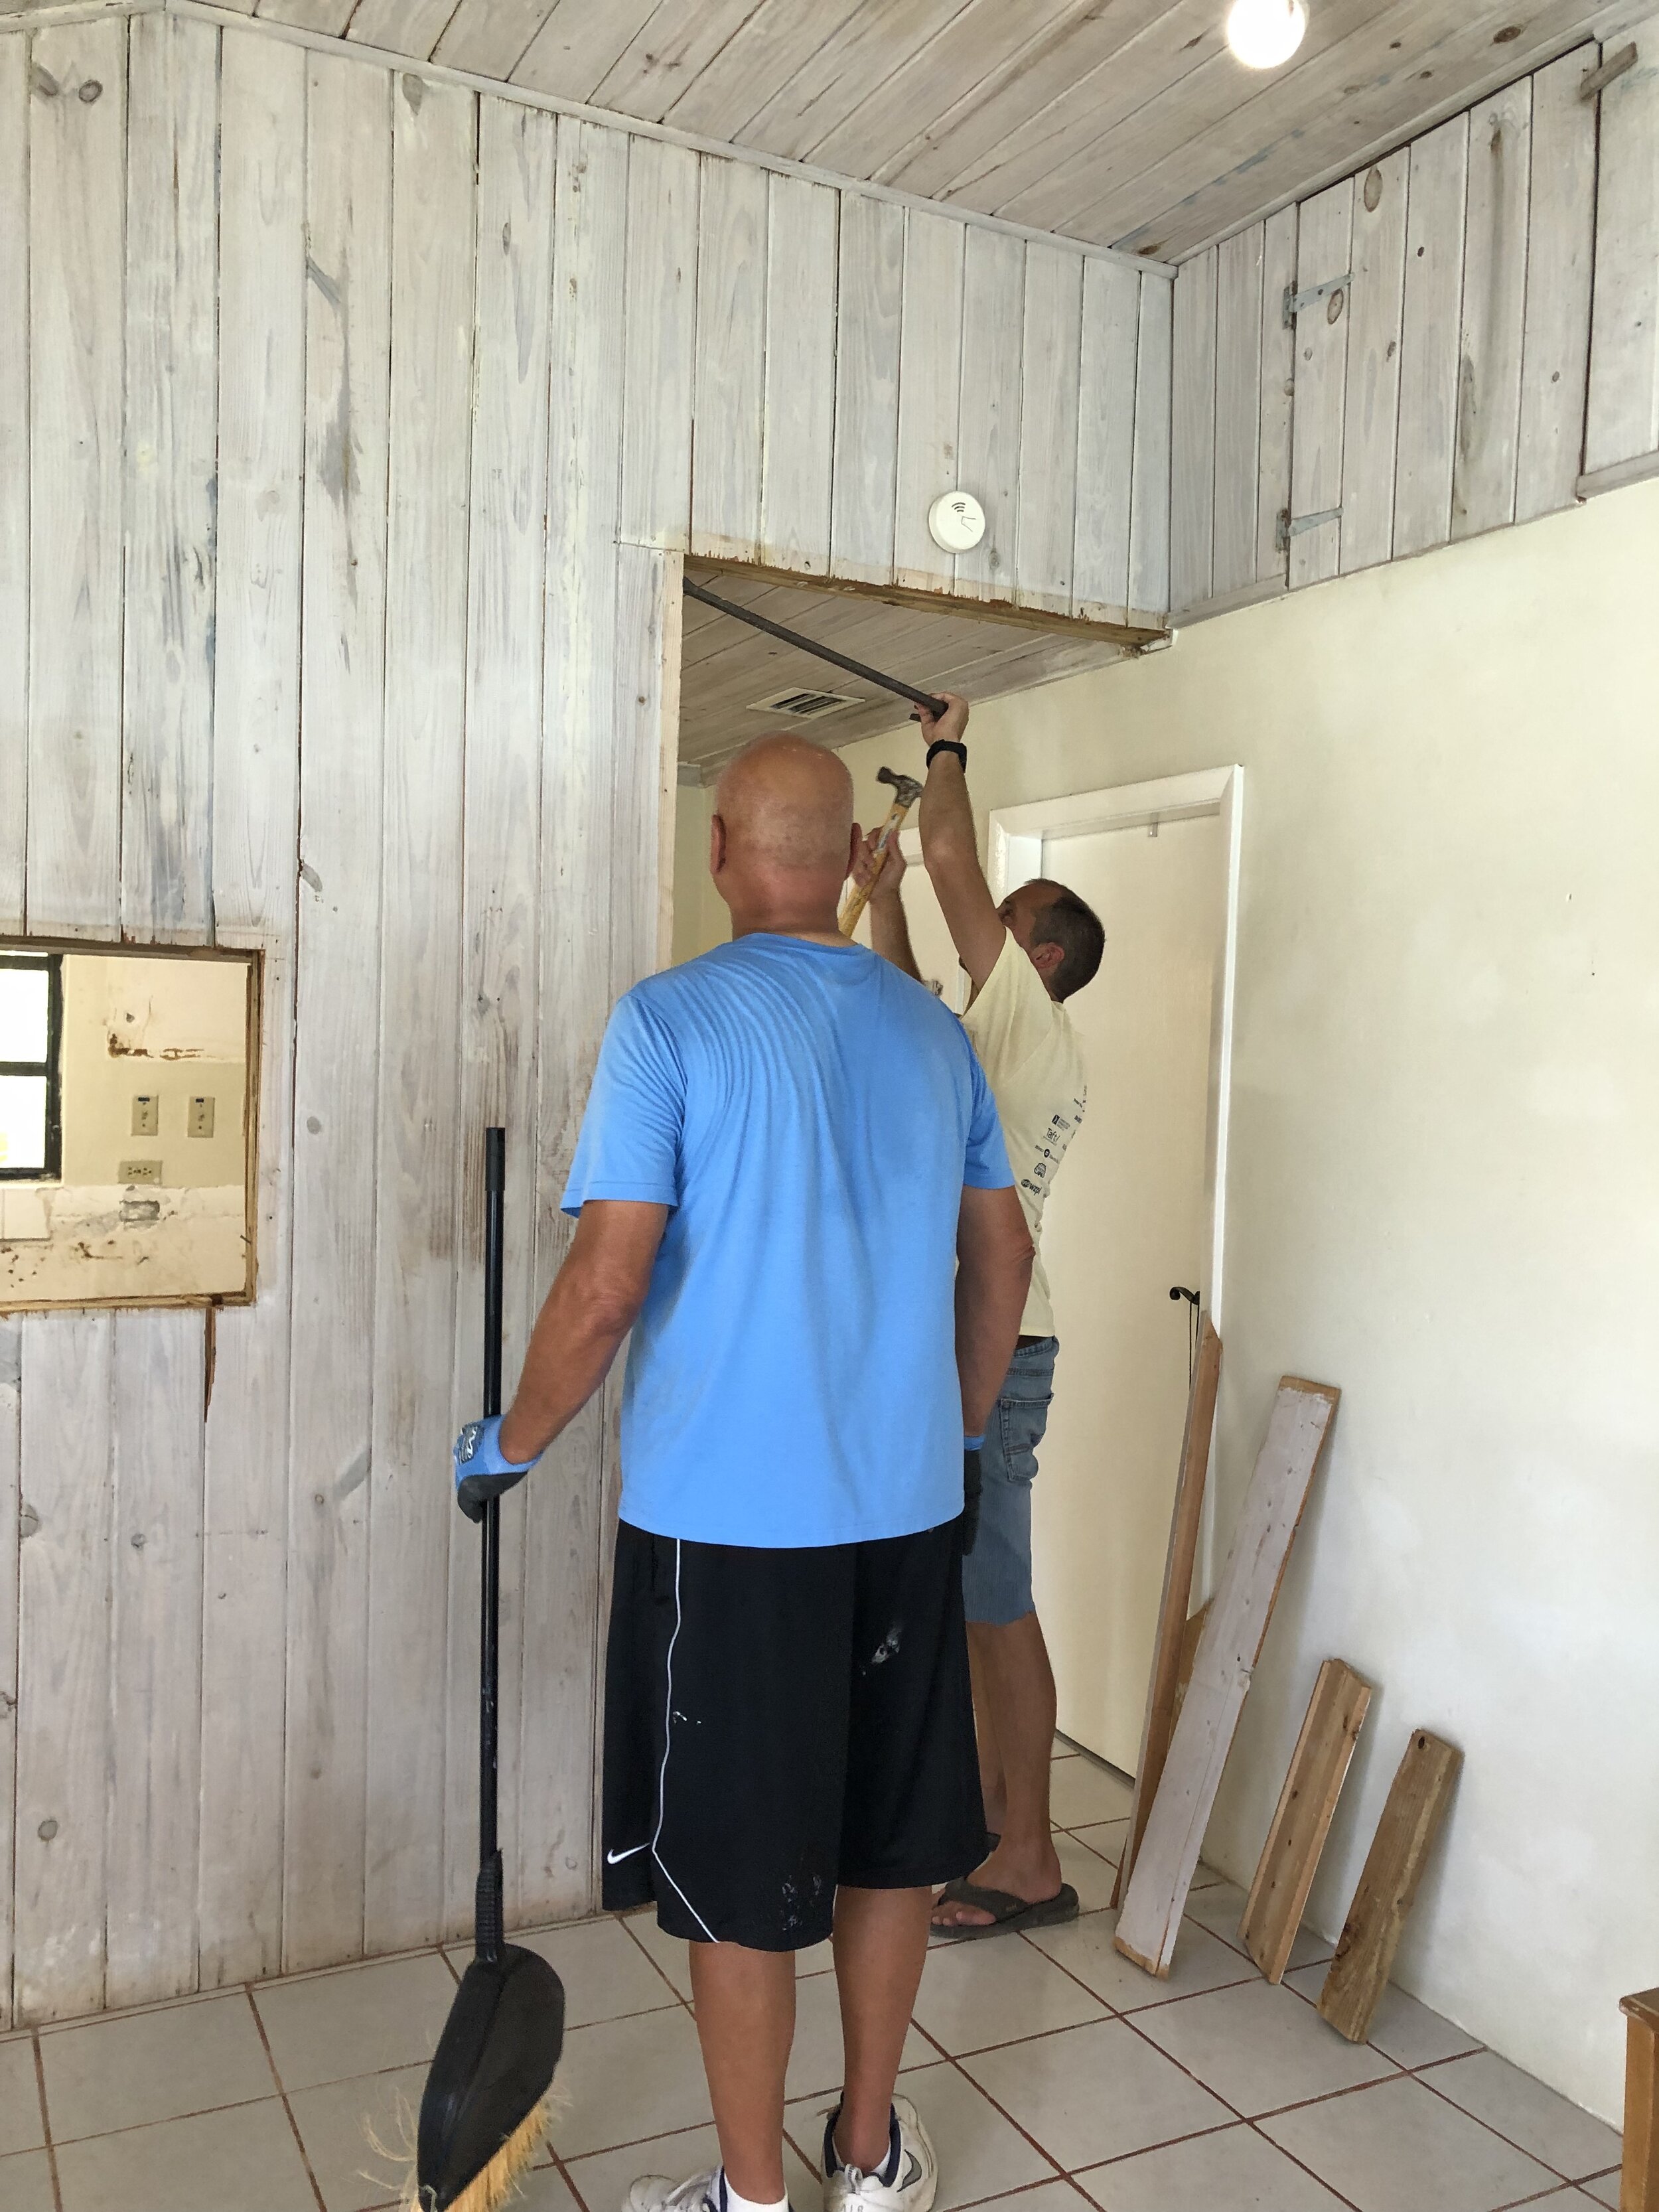
Pulling the cypress off the wall so we would reuse it on the new ceiling

Trouble…

The wall is down!
While they were doing that and I was waiting for our materials to be cleared by Customs, I went room by room and sorted everything into a trash or donate pile. One thing you become hyperaware of on the island is your environmental footprint. Unfortunately, they do not have recycling programs available, so everything ends up in the dump. Unlike here in the states where landfills are mostly out of sight, out of mind - on the island there are several dumps and they are located right off the main highway. It’s not uncommon to have to bring your own trash to the dump which is not the most appealing task, but it certainly serves as a healthy reminder that the trash we produce doesn’t just magically disappear. This, coupled with the fact that there are many people on the island in need of household essentials meant, I tried to keep as much in the donate pile as possible.

A driveway bonfire - keeping trash out of the dump


There were two tasks we decided it made more sense to hire out than try and tackle on our own. The first was blocking in the kitchen window along with repairing a bunch of areas where the concrete walls were spalling.
The second task was clearing out years of overgrown vegetation on the property. The concrete work was something that could be done while Tom was getting other items checked off the list and the landscaping wasn’t something we even planned to do, but it was desperately needed (plus, plants are different than in the.midwest, so we weren’t even sure what needed to go and what should stay).

The hill along the driveway BEFORE being cleaned up
On Wednesday, a local concrete contractor came by first thing in the morning to start blocking the window, but there was one problem, he didn’t have any block or concrete with him. We also learned it’s pretty customary to have materials on site versus the contractor supplying the materials. Since we had no idea where you get concrete on the island, he agreed to go with Tom to pick it up, but to no one’s surprise (ha!), our rental van wouldn’t start. After waiting for a bit to see if we could get another van, Tom decided we were losing too much time and went with the old pour soda on the battery terminals trick. Problem solved! Can I just say - sometimes it really pays to be married to a farm boy!

Kitchen ceiling is down
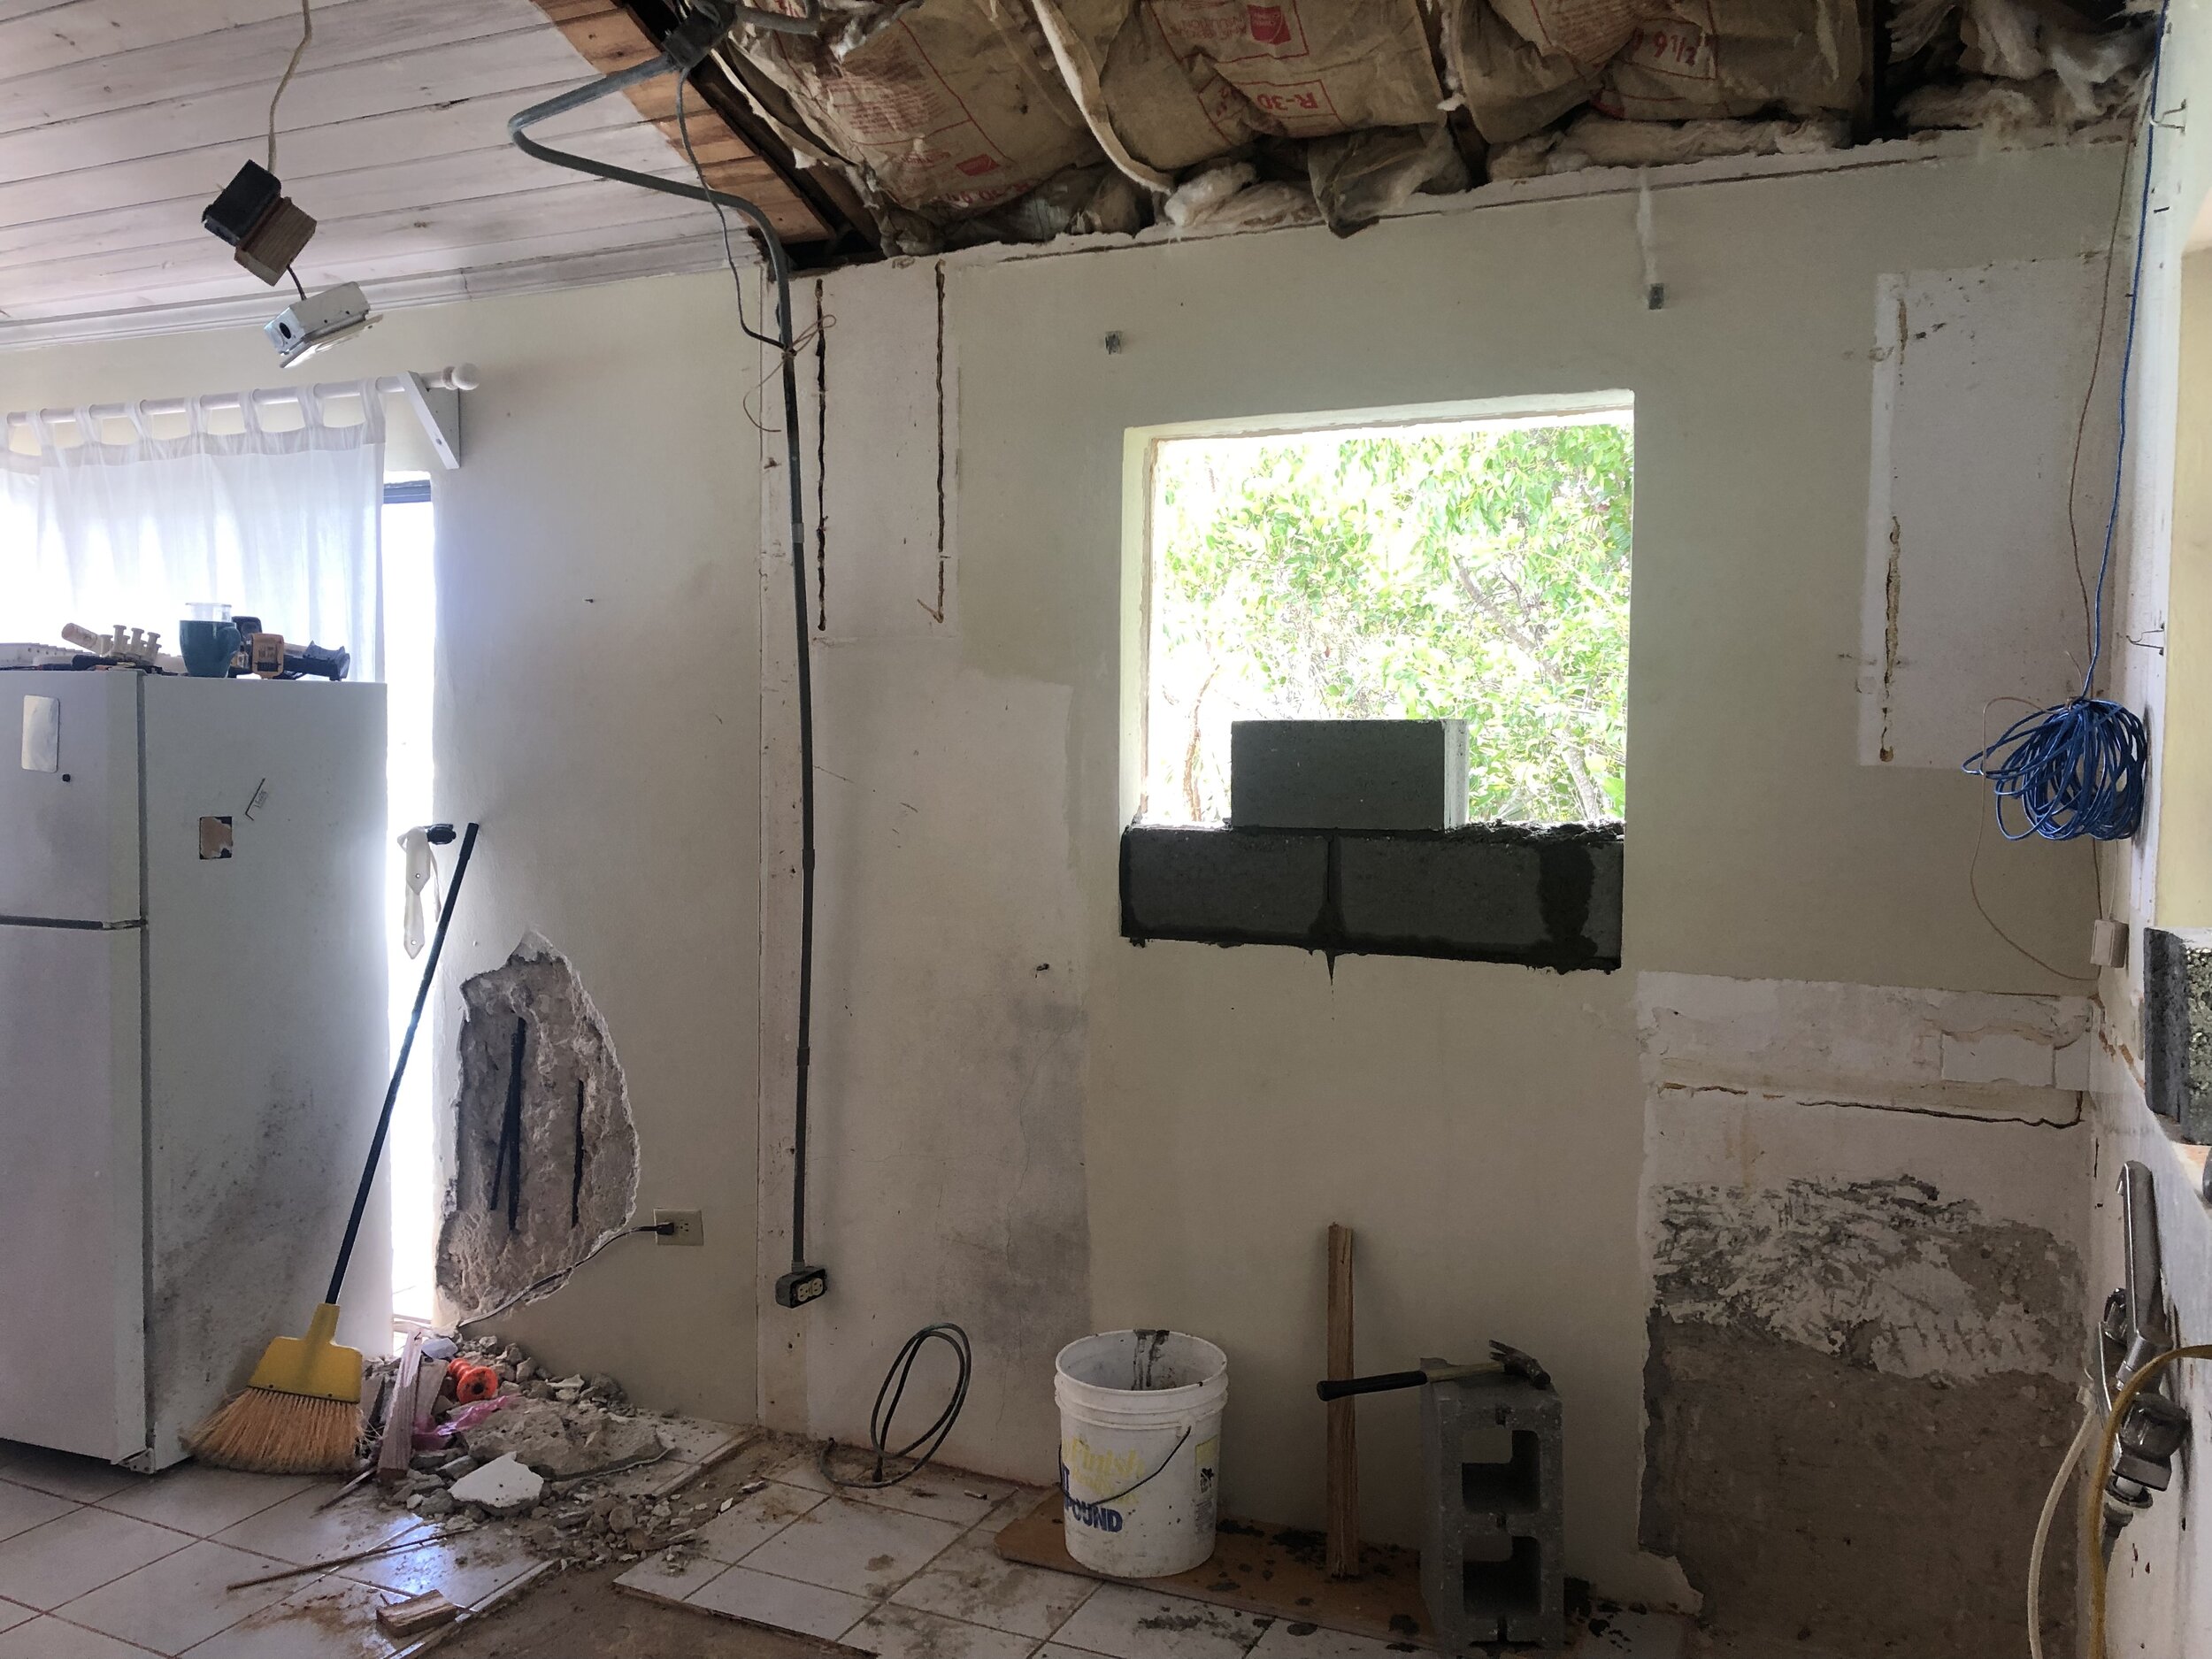
Bye bye window!

Andre fixing the spalling walls

New insulation is up, time to re-do the wiring

Lu lending a helping hand as Tom starts to rehang the cypress we saved from the wall we removed

Almost done with the ceiling!
While the window was being blocked in and I was waiting on Customs, Tom and I decided to run a couple of errands. First to the paint store to get our pre-ordered 5 gallon bucket of paint (we pre-ordered because otherwise, there is no guarantee they would have the paint we needed, when we needed it), then to the hardware store and finally to get more concrete block.

Waiting for our paint - thanks to Sophia for all her help!
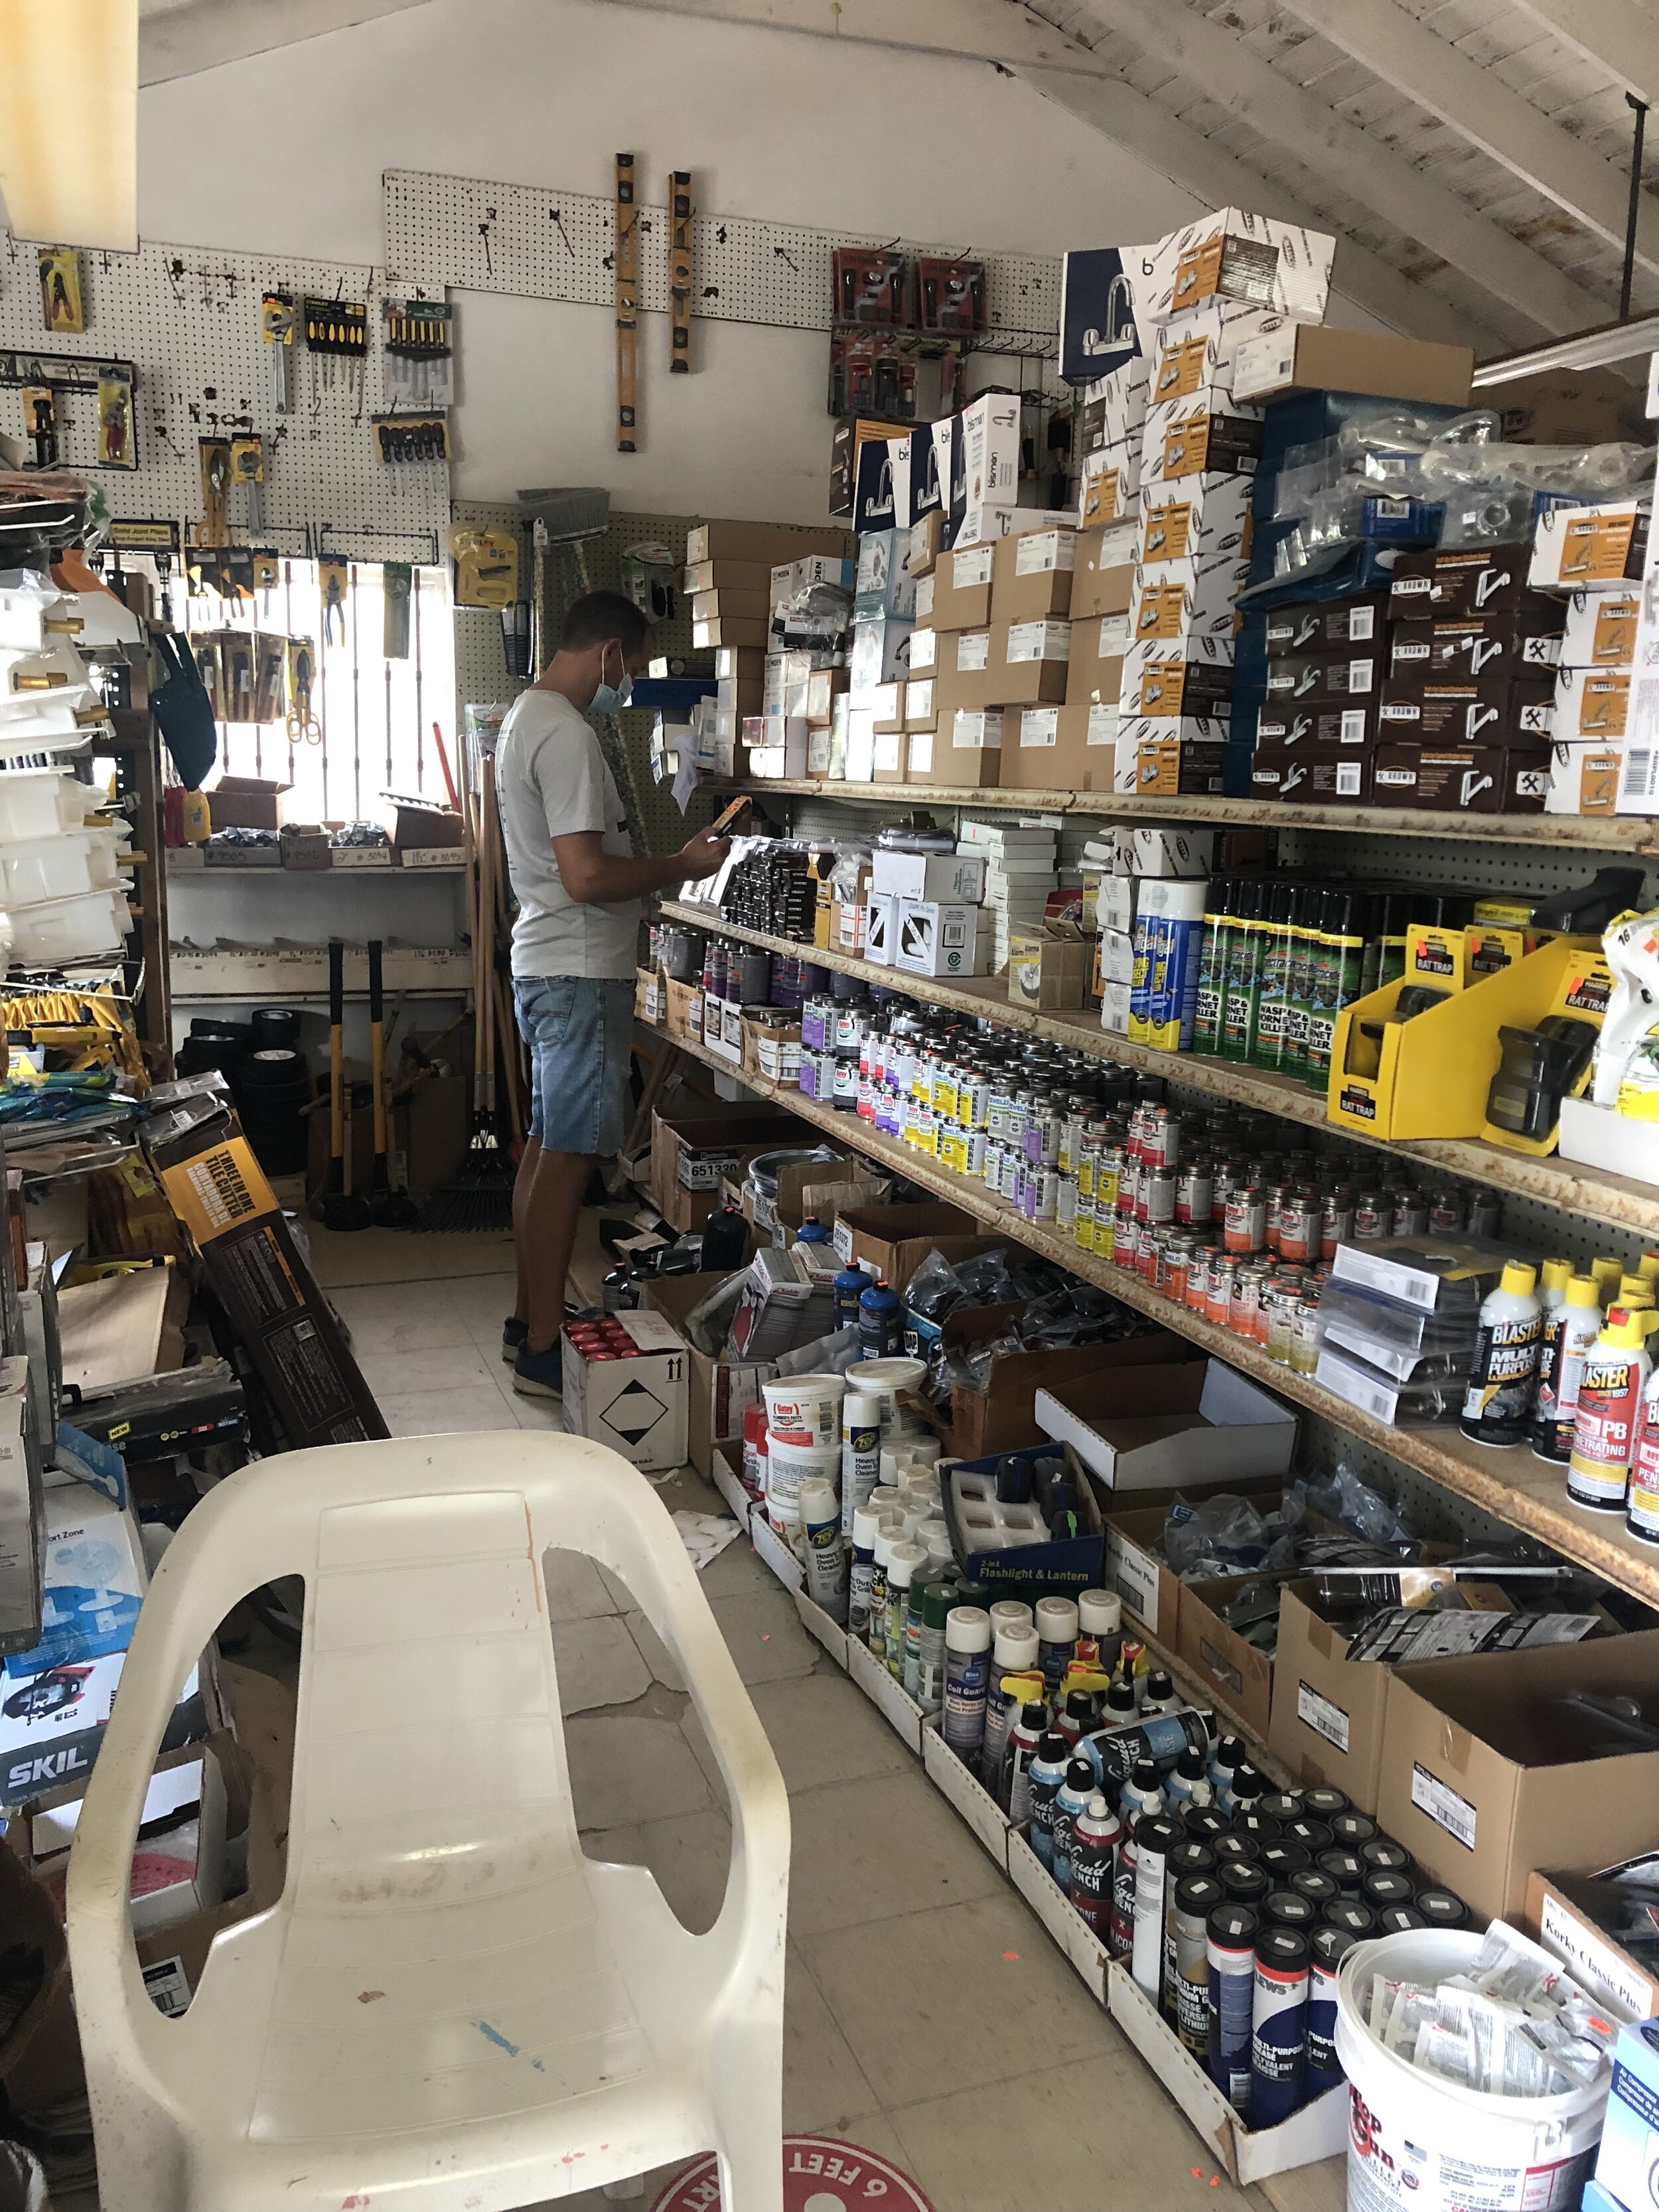
At the hardware store
When we got back to the house I got the call that I needed to go to the customs brokers office because he had several questions before they could submit our paperwork to Customs. Honestly, this was the part of the process I was most unclear about which also made it the part I was most nervous about. So, my Dad was kind enough to come along with me because this was only my second time ever driving on the opposite side of the road (eek).

Dad and I before heading out!

The port in Governors Harbour - I spent a lot of time in the white building on the right side of the photo

Dad patiently waiting for me to sort out all the questions with Customs

Our first shipment of stuff once it had been unloaded from the container
I’ll spare you all the details, but after being at the brokers office for 3 hours and sorting through a lot of receipts and answering even more questions, our stuff was finally cleared (after we had been denied twice). I was so happy I could have done a jig, but when I walked out to give the guy on the fork lift our approved papers I noticed he had already unloaded all of our stuff off the container. I was confused because when I talked to the office a few days prior I was told they would be delivering the container to the house so we could unload the materials as we needed them. Lesson learned, you have to request the container with the freight forwarder, otherwise they consider everything loose cargo. The good news is they said they could deliver everything to the house that afternoon, the bad news - where do you put an entire shipping container worth of materials and appliances in a small house that you’re about to replace all the flooring in?! Well, you don’t. So, they agreed to store the items we didn’t need quite yet and they would deliver them when we were ready the following week. With no room in the house, we stored everything from the first delivery under a tarp on the deck until we were ready for it. Not optimal, but, Hallelujah - our stuff had arrived (along with our first 40 yard dumpster)!!

Our first delivery!
After sorting through everything, we realized the electrical wire (AKA the most critical material we needed) hadn’t arrived. Tom needed the wire to run all new electrical and obviously the best time to do that is when the ceiling is exposed. The freight forwarder said it went out on the boat, but when I called the customs broker to see if they knew where it was, they said I would need to go back to the port to look for it. Sounded like another interesting adventure, and one I was going to have to do alone since Tom needed my Dad’s help. So, off I went. They literally had to beat the lock off the container but I was finally able to get in and search. Unfortunately, the electrical wire wasn’t anywhere in sight. Thankfully, Tom was able to get some wire at the hardware store, but materials there are really expensive and it didn’t make a ton of sense to buy all the wire we need, when we had tons of it arriving any day (hopefully). So, we moved forward as best we could and started replacing the living, dining and kitchen floors.
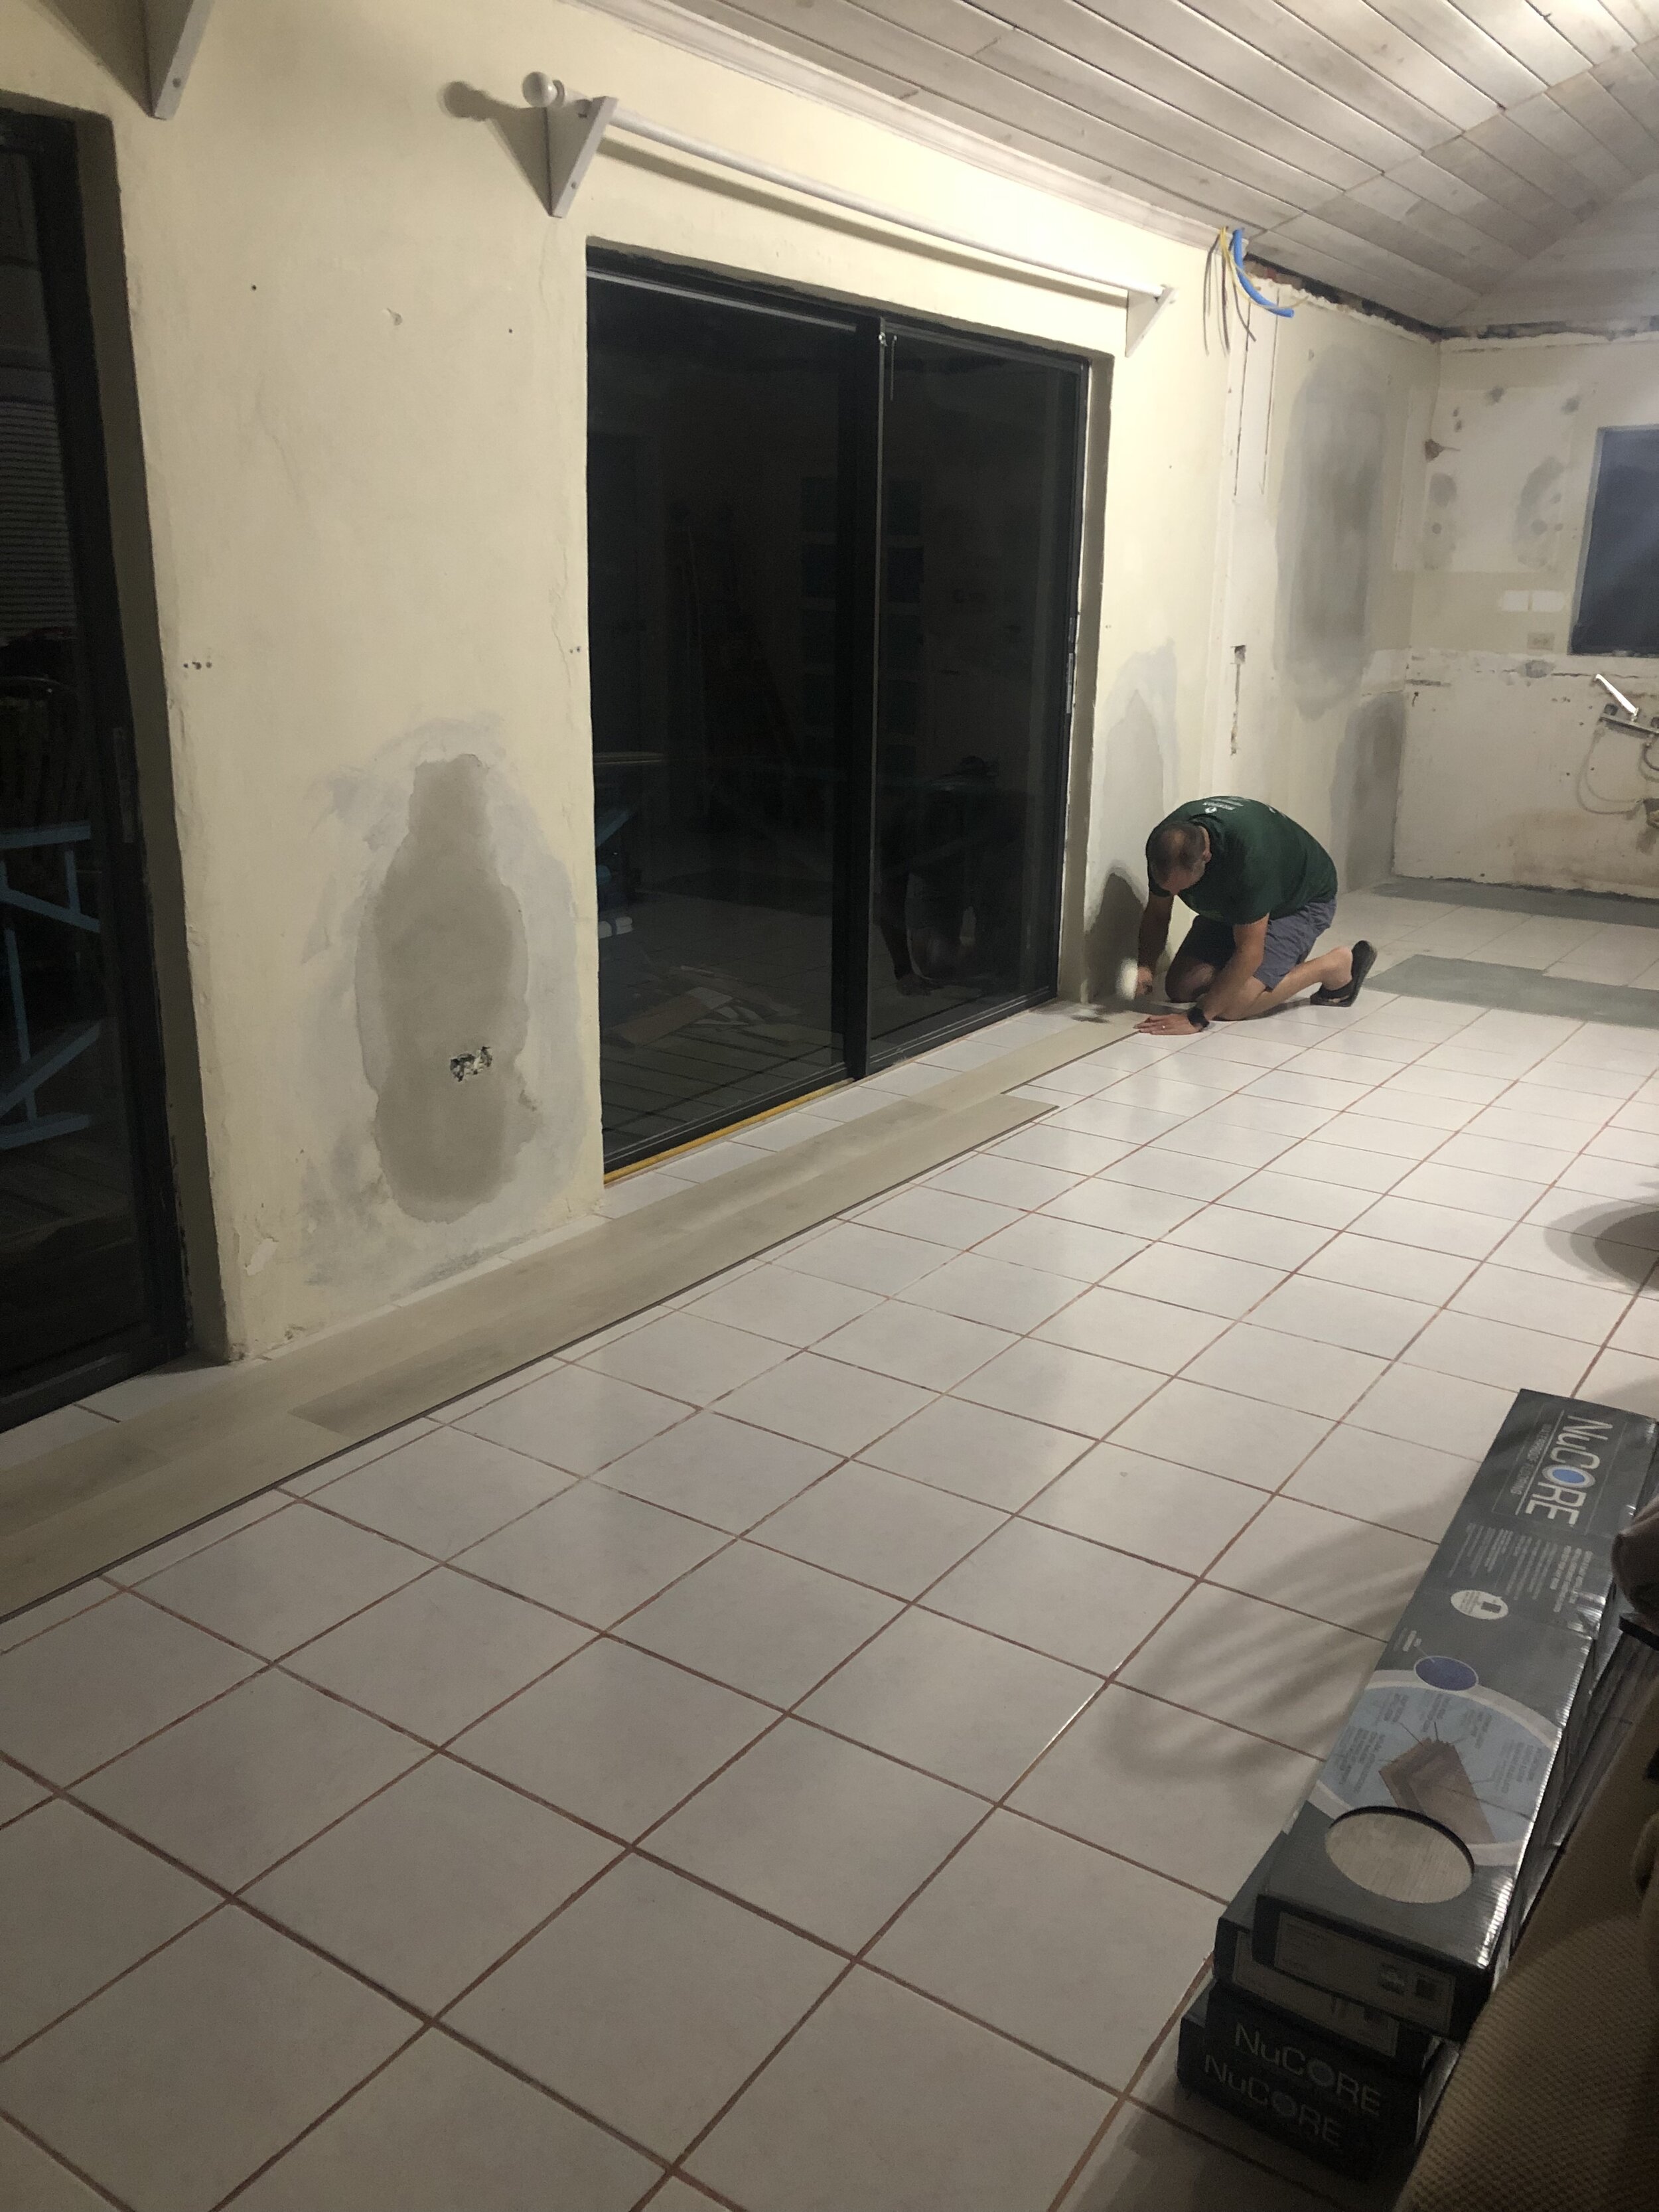
Laying the first bit of flooring - just one of many late nights working

Continuing to lay the floors - this truly was a family effort
One of the most challenging things about this project was trying to live and work in such a small space. We were constantly shuffling things around (needless to say, with each shuffle I found more for the donate pile) and some days it felt like we spent more time trying to find the tool we needed than actually working.
Everyday we’re shuffling…
On Saturday my Dad and Tom worked a bit in the morning, but we decided we needed to take the afternoon off and show my parents around the island. We headed to Leon Levy Preserve and then to stunning French Leave beach. It was so nice to relax for a bit and share the island with them.

Mom and T at Leon Levy

Dad and his sidekick Lu at French Leave Beach (the pink sand is incredible)
Honestly, I’m not sure how we would have survived the first week without my parents there. They stayed in the house across the street which was perfect because it gave us a usable kitchen and clean space to eat. My Dad worked alongside Tom from 7AM until 7PM every single day and let me tell you, it was hard and HOT work. He did absolutely anything we needed and he saved me from a lot of heavy lifting that if he wasn’t there, I would have inevitably tried to do. My Mom on the other hand, watched the kids while I was running back and forth to the port or helping my Dad and Tom. She also made sure there was never a single piece of dirty laundry (if you know her, you’re not surprised) and we were all well fed, all the time. We are so grateful for all of their help and that we were able to share such a fun, once in a lifetime journey with them. THANK YOU MOM & DAD!!!

Best parents around!
Six days in, it was time for me to start painting. Tom hates to paint and I don’t mind it, so painting has always been my task in all of our renovation projects. I had to pick the color weeks prior when I placed our paint order and decided to go with Benjamin Moore White Heron. I was kind of going out on a limb since I had never seen the cabinet color in person, but I’ve used this color in the past and know it’s a soft white with a few gray undertones that, in a perfect world, would complement the cypress ceiling. Tom jokes if it was up to me, I would paint the entire world white and he’s kind of right. I prefer things to be light, airy and calming. I was actually really eager to get the paint on the wall because the existing butter colored walls were turning the floors a yellowish/ green color and despite knowing it would be fine once I painted, it was kind of freaking me out that maybe I didn’t pick the right floors (again, a big decision to make from 1,100 miles away). It is always crazy to me how impactful color, or the lack thereof can be. As soon as the walls went white, the floors mimicked the cypress ceiling perfectly and it all felt right.

Priming!
I did one coat of primer on the kitchen, living and dining rooms to cover all the concrete work that had been done and then did the trim and two finish coats on the walls. I literally painted until my back hurt so bad I could barely stand, but I did have some help along the way and the end product was SO worth it.

My little paint helper

We’re still perfecting his technique, ha!
On Monday we planned to take my parents to the airport and then travel around the north end of the island a bit to check out a few places we’ve never been. The weather had been 88 and sunny every single day, but today we weren’t so lucky and after dropping my parents off we went to Preacher’s Cave, but within minutes it started to pour. With the rain came more mosquitos than I’ve ever seen in my life. They absolutely destroyed us in a few seconds flat, so we retreated to the car and ate our packed lunch while the rain passed. Once it had, we made one more quick stop to the Sapphire Blue Hole where Tom took a quick jump, but unfortunately, the mosquitos here were even worse and with no bug spray in sight, we got out of there as fast as we could.

A quick stop at Queens Baths on the way to the airport

Preachers Cave right before the rain (and mosquitos)

A quick plunge at Sapphire Blue Hole
On the way back to the house the rain stopped and we did squeeze in a few more stops!

The Cliffs
As I mentioned earlier, we ordered all ready to assemble cabinets to keep the shipping costs and potential for damage down. Tom and my Dad assembled the cabinets the week prior and with the floors, ceiling and painting complete, it was time to install them. The only problem is, I didn’t have the sink and faucet come with the first delivery, so back to the port I went to track both of those down. While there, I also arranged for our dumpster to be picked up and another one delivered.

Dumpster delivery!

Installing cabinets

We needed a very shallow cabinet for the island, so we opted for wall cabinets and built them up on a base Tom created to get the finish height we needed.
That afternoon I was able to get the kids bedroom painted (after they drew all over the walls). I didn’t want to stop until it was done so the kids would have a place to sleep, but by the time I got done it made for another very late dinner on the floor.

Drawing on their bedroom walls
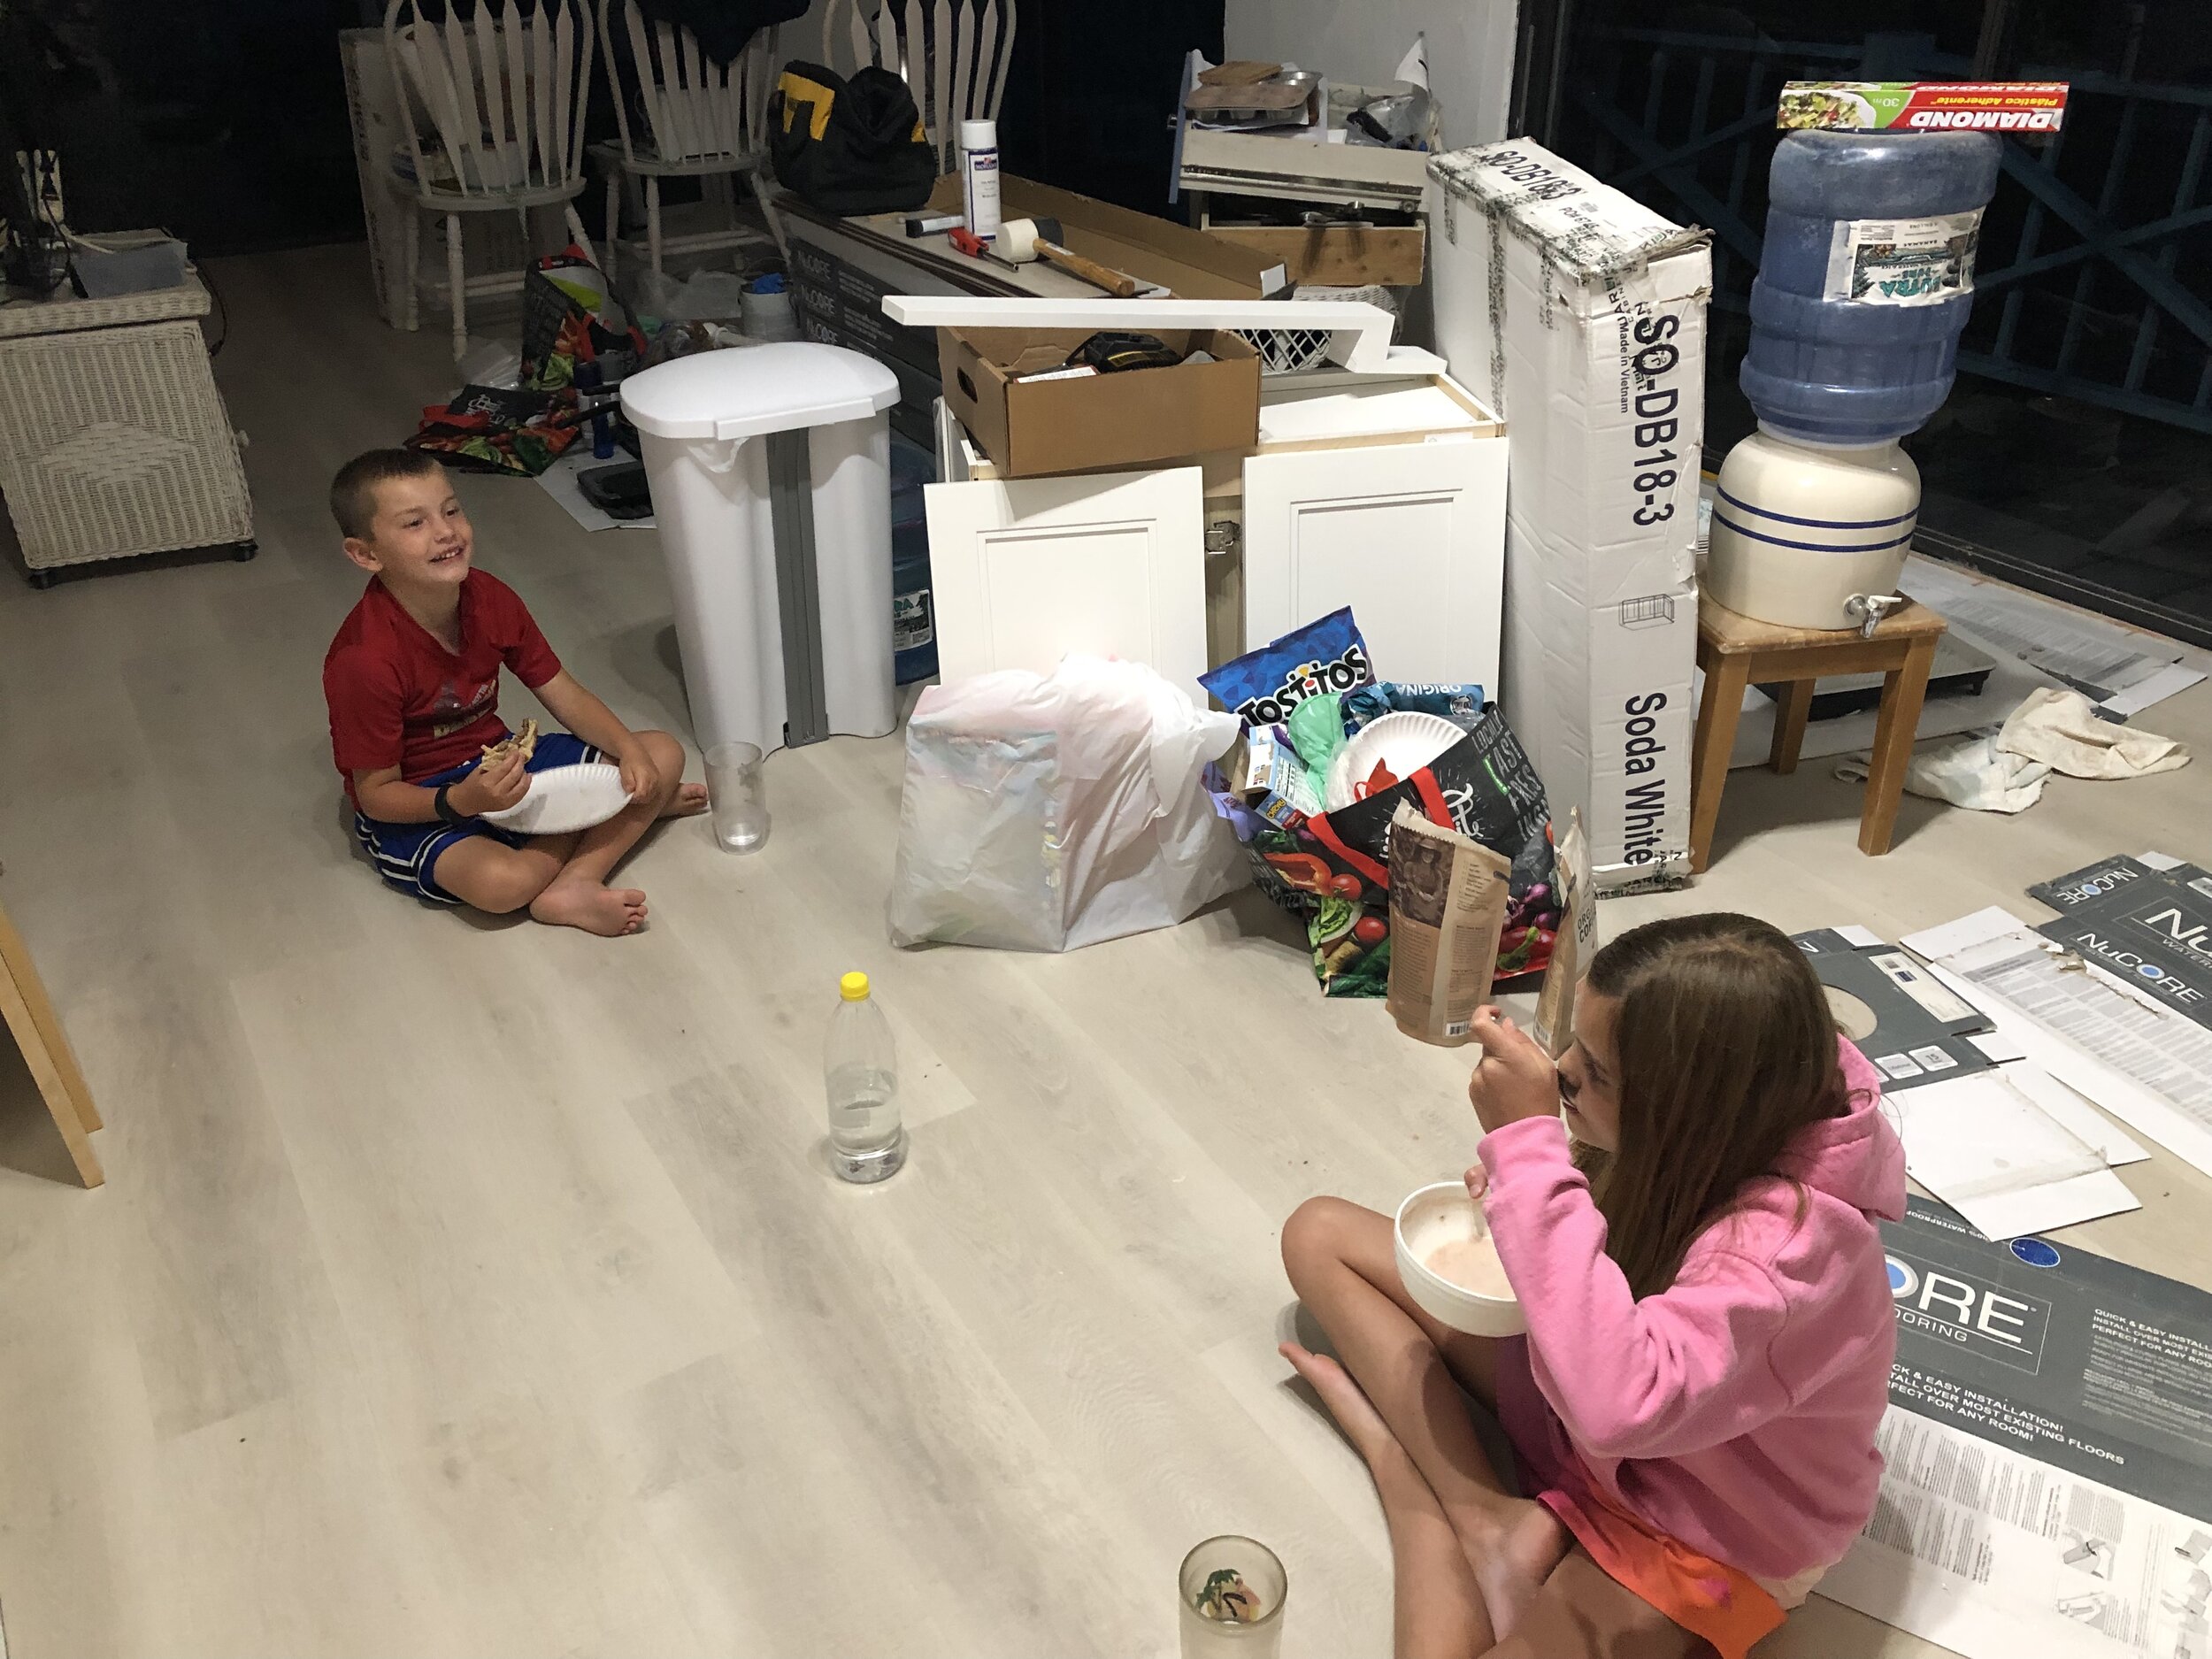
This is what dinner looked like MANY nights
The next day while I was painting the master bedroom, Tom replaced the floors in the kids bedroom. This was a tough day. I think exhaustion was starting to set in and I wasn’t feeling all that great. The kids really had to occupy themselves most the day because at this point we were working from 7AM until around 6PM everyday, then we would take an hour or so to swim in the water with them, I’d make dinner, we’d eat, and once the kids were in bed we would go back to work from 9PM-12AM. But, thankfully around 3PM our second delivery arrived and it was just the pick-me-up I needed. In this delivery we received the appliances, countertops, sectional and we THOUGHT more electrical wire, but turns out it still wasn’t there. Receiving countertops and appliances meant we were getting really close to the finish line and the best part was, nothing came in damaged (other than the back corner of the dishwasher) which was a huge weight lifted off my shoulders. Not to mention, the delivery guys were so nice and helpful!

Cutting in the ceiling and corners in the master bedroom

The kids occupying themselves - thanks to the shallow water, they could go out on kayaking adventures
So far, things had been going as well as we could have hoped, but there were definitely a few issues we faced along the way. While planning the reno, one of the hardest decisions was figuring out what to do about countertops and by the time we were making the decision, we were two weeks out from leaving. We went back and forth trying to decide if we should have a slab shipped down there and then try to fabricate on the island, or if we should send pre-fab slabs down. I didn’t like any of the pre-fab slabs that were available and we weren’t very confident we would find a fabricator that could do the work while we were there, nor were there many quartz slabs that could ship fast enough, so we made the VERY RISKY decision to have solid surface tops fabricated in Indianapolis. If you’re reading this, NEVER, EVER do this. There is a reason countertops are templated AFTER cabinets are installed, yet here we were having countertops fabricated (without templating) for cabinets we had never seen and weren’t even assembled yet. We knew the risk we were taking, but we took it anyway because it felt like the only way to get a material we liked, in the timeframe needed. Tom built a shipping crate for the tops and thanks to a local fabricator he works with quite a bit, the tops were finished in a week. Once they were done, Tom crated them up and shipped them off to the freight forwarder.

Building the shipping crate for the countertops
Remember how I told you we never got around to checking measurements when we were there for the closing? Well, fast forward to our arrival day and after putting the kids to bed we were sitting there looking at the kitchen and decided to check the measurement. Guess what? It was off. Actually, the wall measurement wasn’t off, but we had the front door a few inches closer to the kitchen than it actually is. I honestly wasn’t shocked. Again, we took these measurements 7 months prior and all it takes is unknowingly hitting the keyboard arrow a few times, and the door ends up on the wrong spot. Needless to say, I was SOO frustrated because this could have easily been avoided. I was also frustrated because we take so much care with our clients to make sure nothing like this happens on their projects, but here I was with countertops that were going to put my kitchen sink slightly off center from the window above. At this point, I was having a minor freak out and I’m not going to lie, at one point I contemplated throwing away the countertops we ordered and getting new ones shipped down on our next visit.
And then I had to check myself.
Despite knowing I had every right to be frustrated, I also know having a kitchen sink that’s a few inches off center from the window is a first world problem and not something to freak out over. There are so many people in need on the island (and in the world in general), to even think about throwing away brand new countertops felt disgraceful. There is not a minute that goes by that I’m not aware of how fortunate we are and while I want all of our properties to reflect the quality of our work, at the end of the day, this was not that big of a deal. Quite frankly, I’m not sure if I hadn’t mentioned it, anyone would even notice (sorry, now you’ll never unsee it, haha). So, I decided we were just going to “roll with it” and if it really drove me crazy when it was all said and done, I could make the window smaller when we replace it. There’s always a silver lining though. Once installed, the countertops looked great, fit just as they were supposed to, and the extra space between the counter and front door leaves the perfect spot for the trash can. In a weird way, the off center sink feels like a metaphor for this entire journey - imperfectly, perfect.

Drilling the hole for the sink faucet - there’s no changing my mind now!

My imperfectly perfect sink
The second issue was once the microwave was installed, it was SOO high! Unfortunately, I wasn’t home while Tom was mounting it and when I walked in I knew we were going to have to re-do it. We planned for it to be at this height to allow for enough clearance between the gas range and the bottom of the microwave, but if we had left it, our kids wouldn’t be able to heat up their own chicken nuggets for another 5 years. No, thank you. The good news is, I had ordered a cabinet, but I just needed the doors, not the frame (remember how the expensive line of cabinets didn’t have all the sizes I needed?), so we were able to use that cabinet above the microwave and by the hair on my chiny chin chin, the doors from the original microwave cabinet fit on the sink base where I needed them. This means the microwave is a bit closer to the stovetop than is optimal with gas, but what good is a microwave if you have to be 5’8” to reach it!?
At this point we were definitely running into more issues than we hoped. First the countertops, then the microwave, next up was the range.
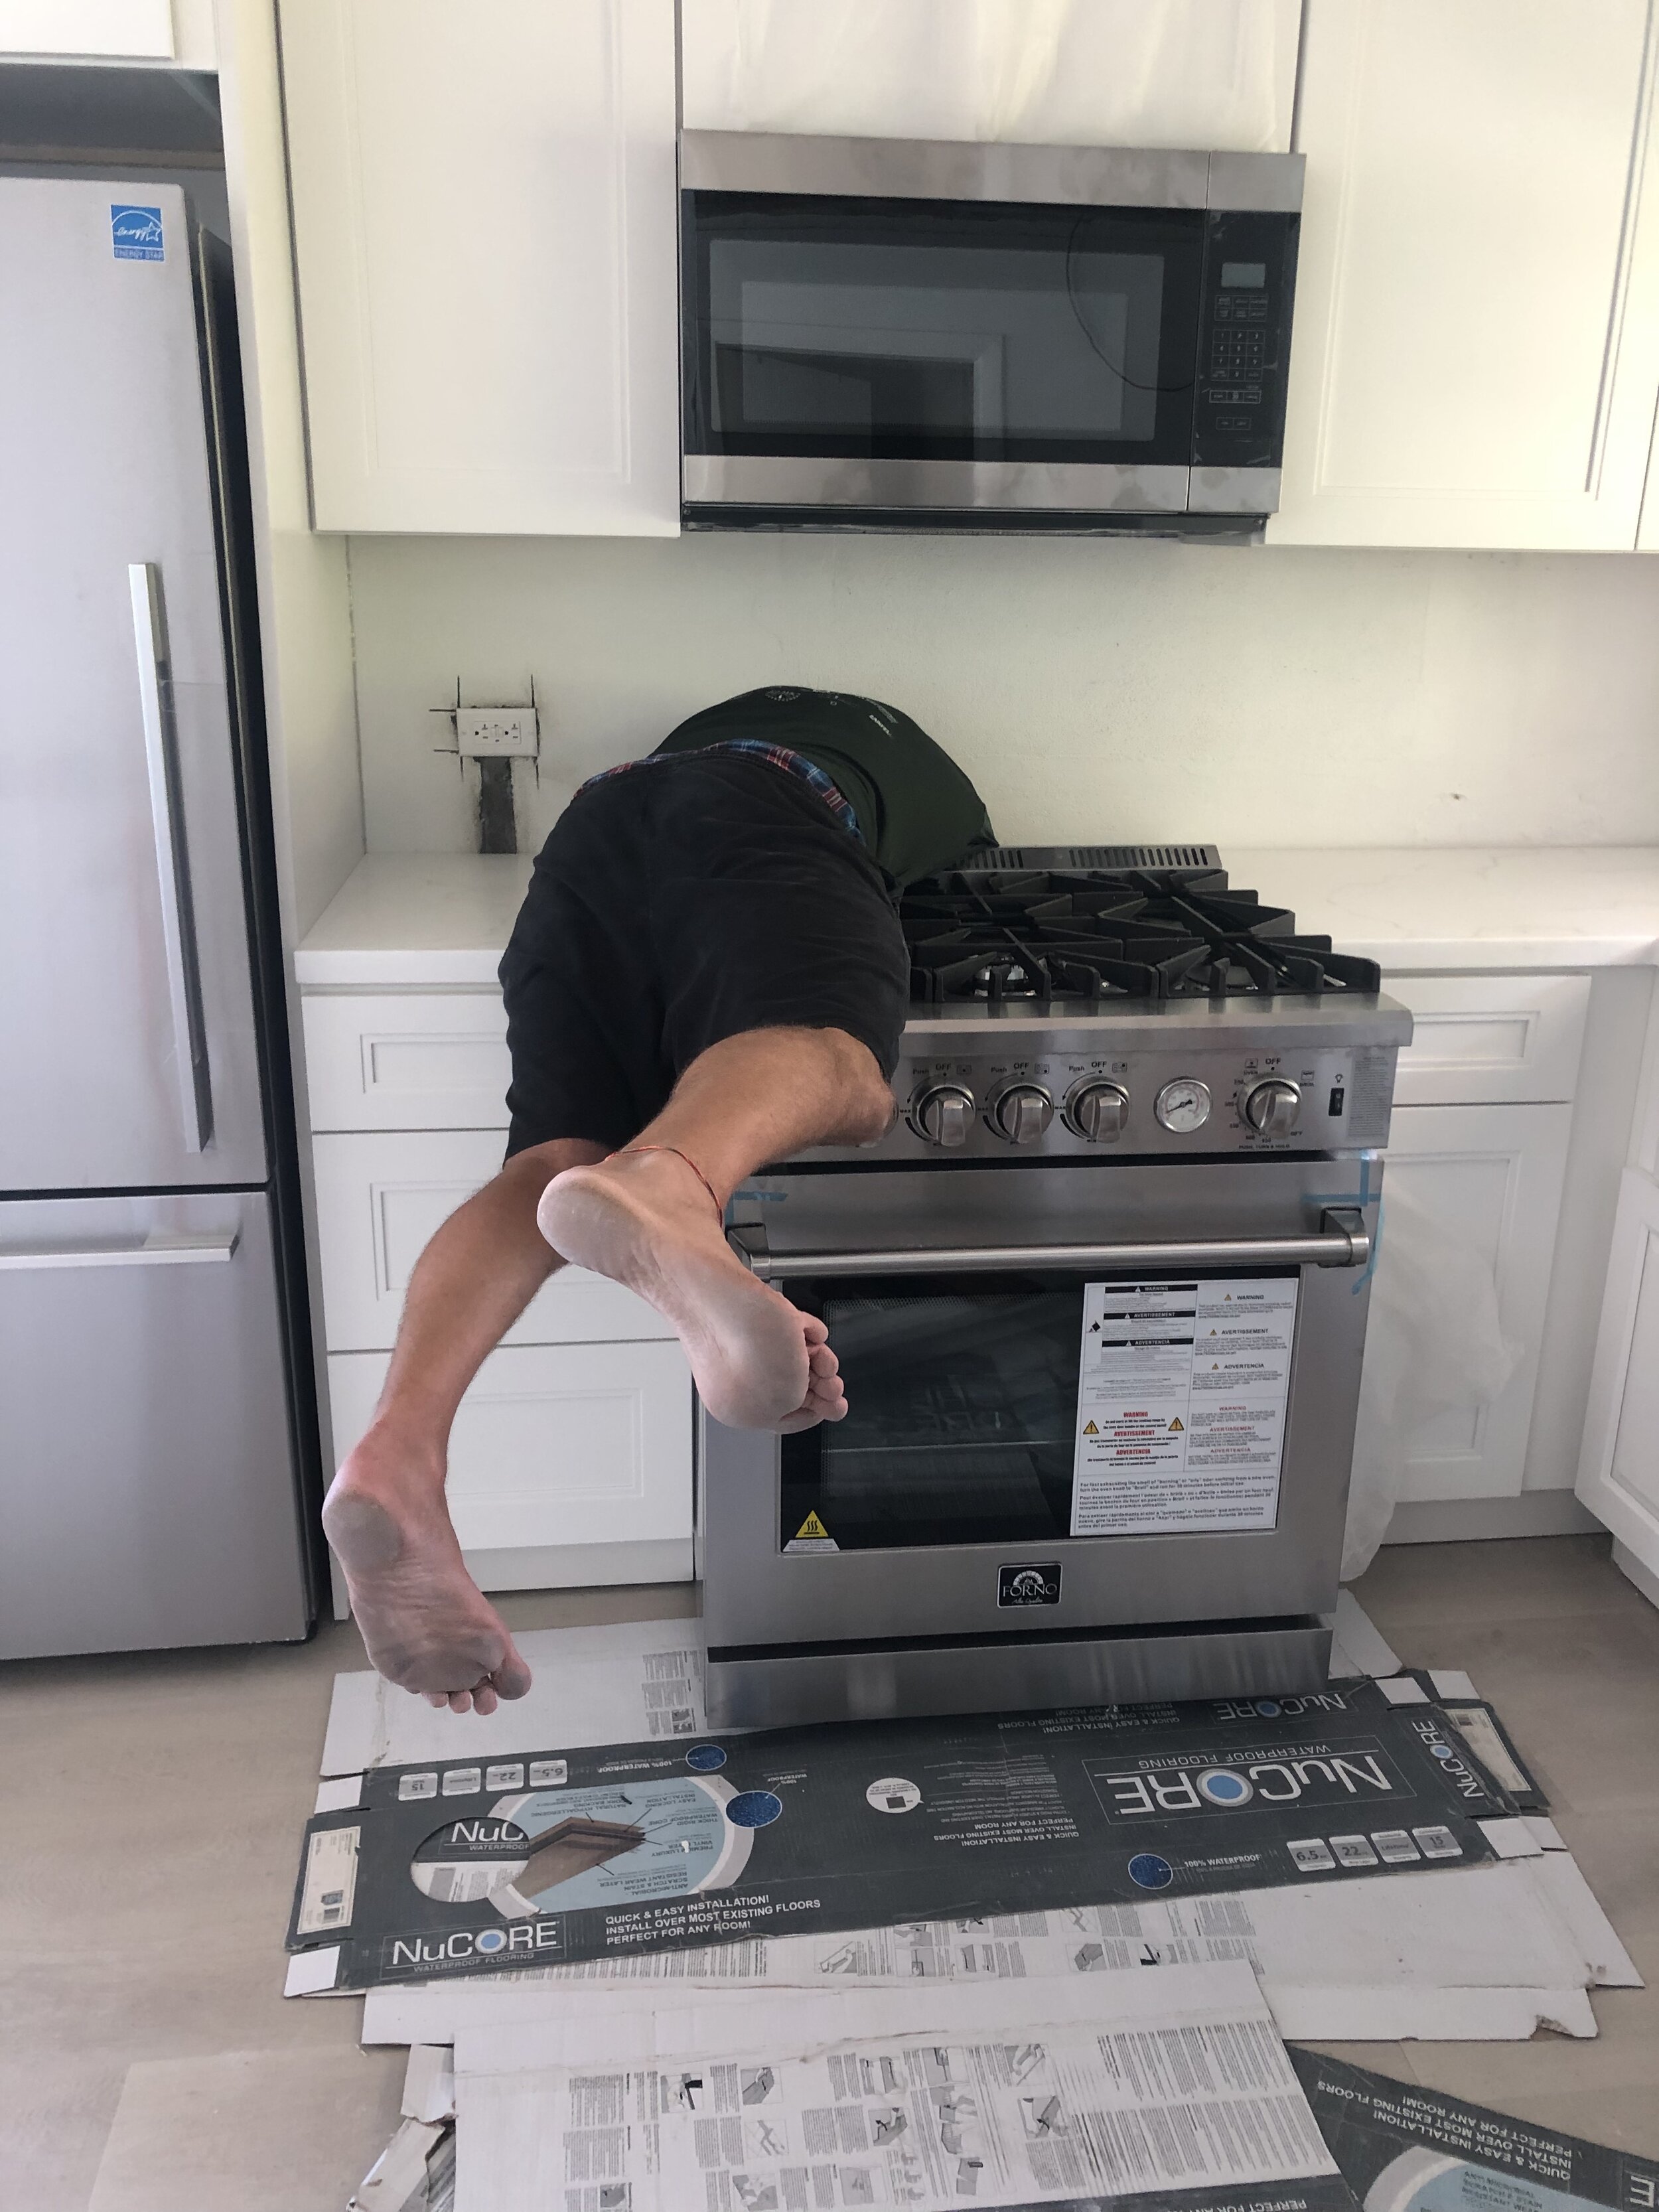
With the gas line moved and the cabinets installed, we thought we were ready to put the range in. So, the day after the microwave debacle we put the kids to bed and decided to convert the range to liquid propane. However, while we were trying to attach the tiniest little bolt into the back of range, it slipped out of Tom’s hands and fell inside the unit. We could hear it rolling around, but for the life of us we could not find where exactly it was. Somehow, it made its way into the most hard to reach corner, so after about 45 minutes of tilting the range at every which angle, Tom removed the bottom panel of the oven and we finally found it, but it’s safe to say our patience was pretty much shot, so we decided to call it a night.
The range waiting to be installed
Repairing the leaking gas line (can you tell the floors were dusty!? Look at those feet!)
The next morning we decided to try and slide the range back into position. We knew it was going to be a tight fit (another reason why countertops should be templated once everything is in place), but let’s just say it was REALLLYYY tight. Tight enough that as we were pushing on it, we thought we might crack the countertops. So, we pulled it back out and evaluated our options. We decided the path of least resistance and risk was to chisel out the uneven concrete backsplash. Previously, we weren’t very concerned about it because it will get covered with tile, but it was stopping us from being able to push the countertops tight to the wall and at this point, we needed to gain 1/4 inch to get the range in comfortably. Thankfully this plan worked, because the alternative options were much more complicated and time consuming.

Chiseling the uneven concrete off the wall
What didn’t work was the gas line. After all the hoopla with the bolt and chiseling concrete, we thought we were finally in the clear, but no such luck! When we turned the range on we immediately smelled gas. . .turns out there was a leak in the line. Guess what that meant? Yep, we had to pull the range back out, AGAIN. Normally a small leak wouldn’t be a huge deal, but the one tool we didn’t bring was a flare. So we packed the kids into the van and headed to the hardware store (where they now knew Tom by name). Thank goodness they had one, and Tom was able to repair the leak. By dinner time we had a working range and things were starting to look up. Or, so it seemed. . .
You know how we were storing everything on the deck? Well, that included our newly delivered sectional and at 3AM we both woke up to the sound of a gusting storm. Not a good situation when your brand new sofa is on the porch. Thankfully we woke up because the tarp had blown off, but we were able to get it covered back up just in time and no damage was done.
The following morning the landscape crew started bright and early. Man, those guys worked hard. The hillside on the property was like a thick jungle and they worked 7 hours a day, for three days straight in 88 degree heat with nothing but machetes and a few wheel barrows. We didn’t even realize it because the hillside was so overgrown, but there are 100+ palm trees on the property along with cactus, aloe, agave and lots of other plants I still need to learn the names of.

Ronald and his crew clearing out the hillside

Tom had to get in on the action

This was another buddy we had hanging around all week - he was HUGE

Look at all those palm trees that were hiding in there!
Meanwhile, we still couldn’t figure out where the heck the electrical wire was and at this point, we really couldn’t do much else without it. I knew it had to be somewhere, so I went back to the port (pretty sure this was my fifth trip at this point) and found my favorite fork lift driver who eventually located the wire inside another shipping container. IT HAD BEEN THERE FOR A WEEK! Oh well, we finally had it and that meant we could finish the ceiling and I could start moving everything back into the kitchen.

Cutting in the can lights - I was certain he was going to break his wrist. Cutting through that cypress is no joke. Note the frog on the top left corner of the window - he was there EVERY. SINGLE. NIGHT.

A close up of Mr. Frog
To be honest, the last few days are kind of a blur. Tom installed fans in the living room and the kids bedroom, installed some of the kitchen hardware (I changed my mind, so the rest will go up on our next trip down), fixed the sliding door that refused to stay shut, installed new shelving in both bedroom closets, hauled lots of construction debris to the dumpster, installed more outdoor storage, cleaned 100 times over, made a final trip to the port for the last shipment of stuff that came in. It felt like a mad dash to the end, because it was.

Installing the kids fan before bedtime
We did take Sunday morning and early afternoon to make a trip down to Lighthouse Point. It’s at the southern most point of the island and Disney recently acquired the land to make it one of their cruise ship destinations, so we wanted to get there before they take over. There are some rugged roads in Eleuthera, but this one might take the cake. God love our mini van. Not sure how it survived this road, or 2 weeks of us (at one point a piece came loose on the bottom and it was dragging for at least 7 days before Tom finally got sick of it and pushed it back into place), but she made it! I’m so glad we took the time and made the trip because Lighthouse Point is truly spectacular. It makes me kind of sad to think its raw and natural beauty is going to be taken over with droves of tourists, but I digress.
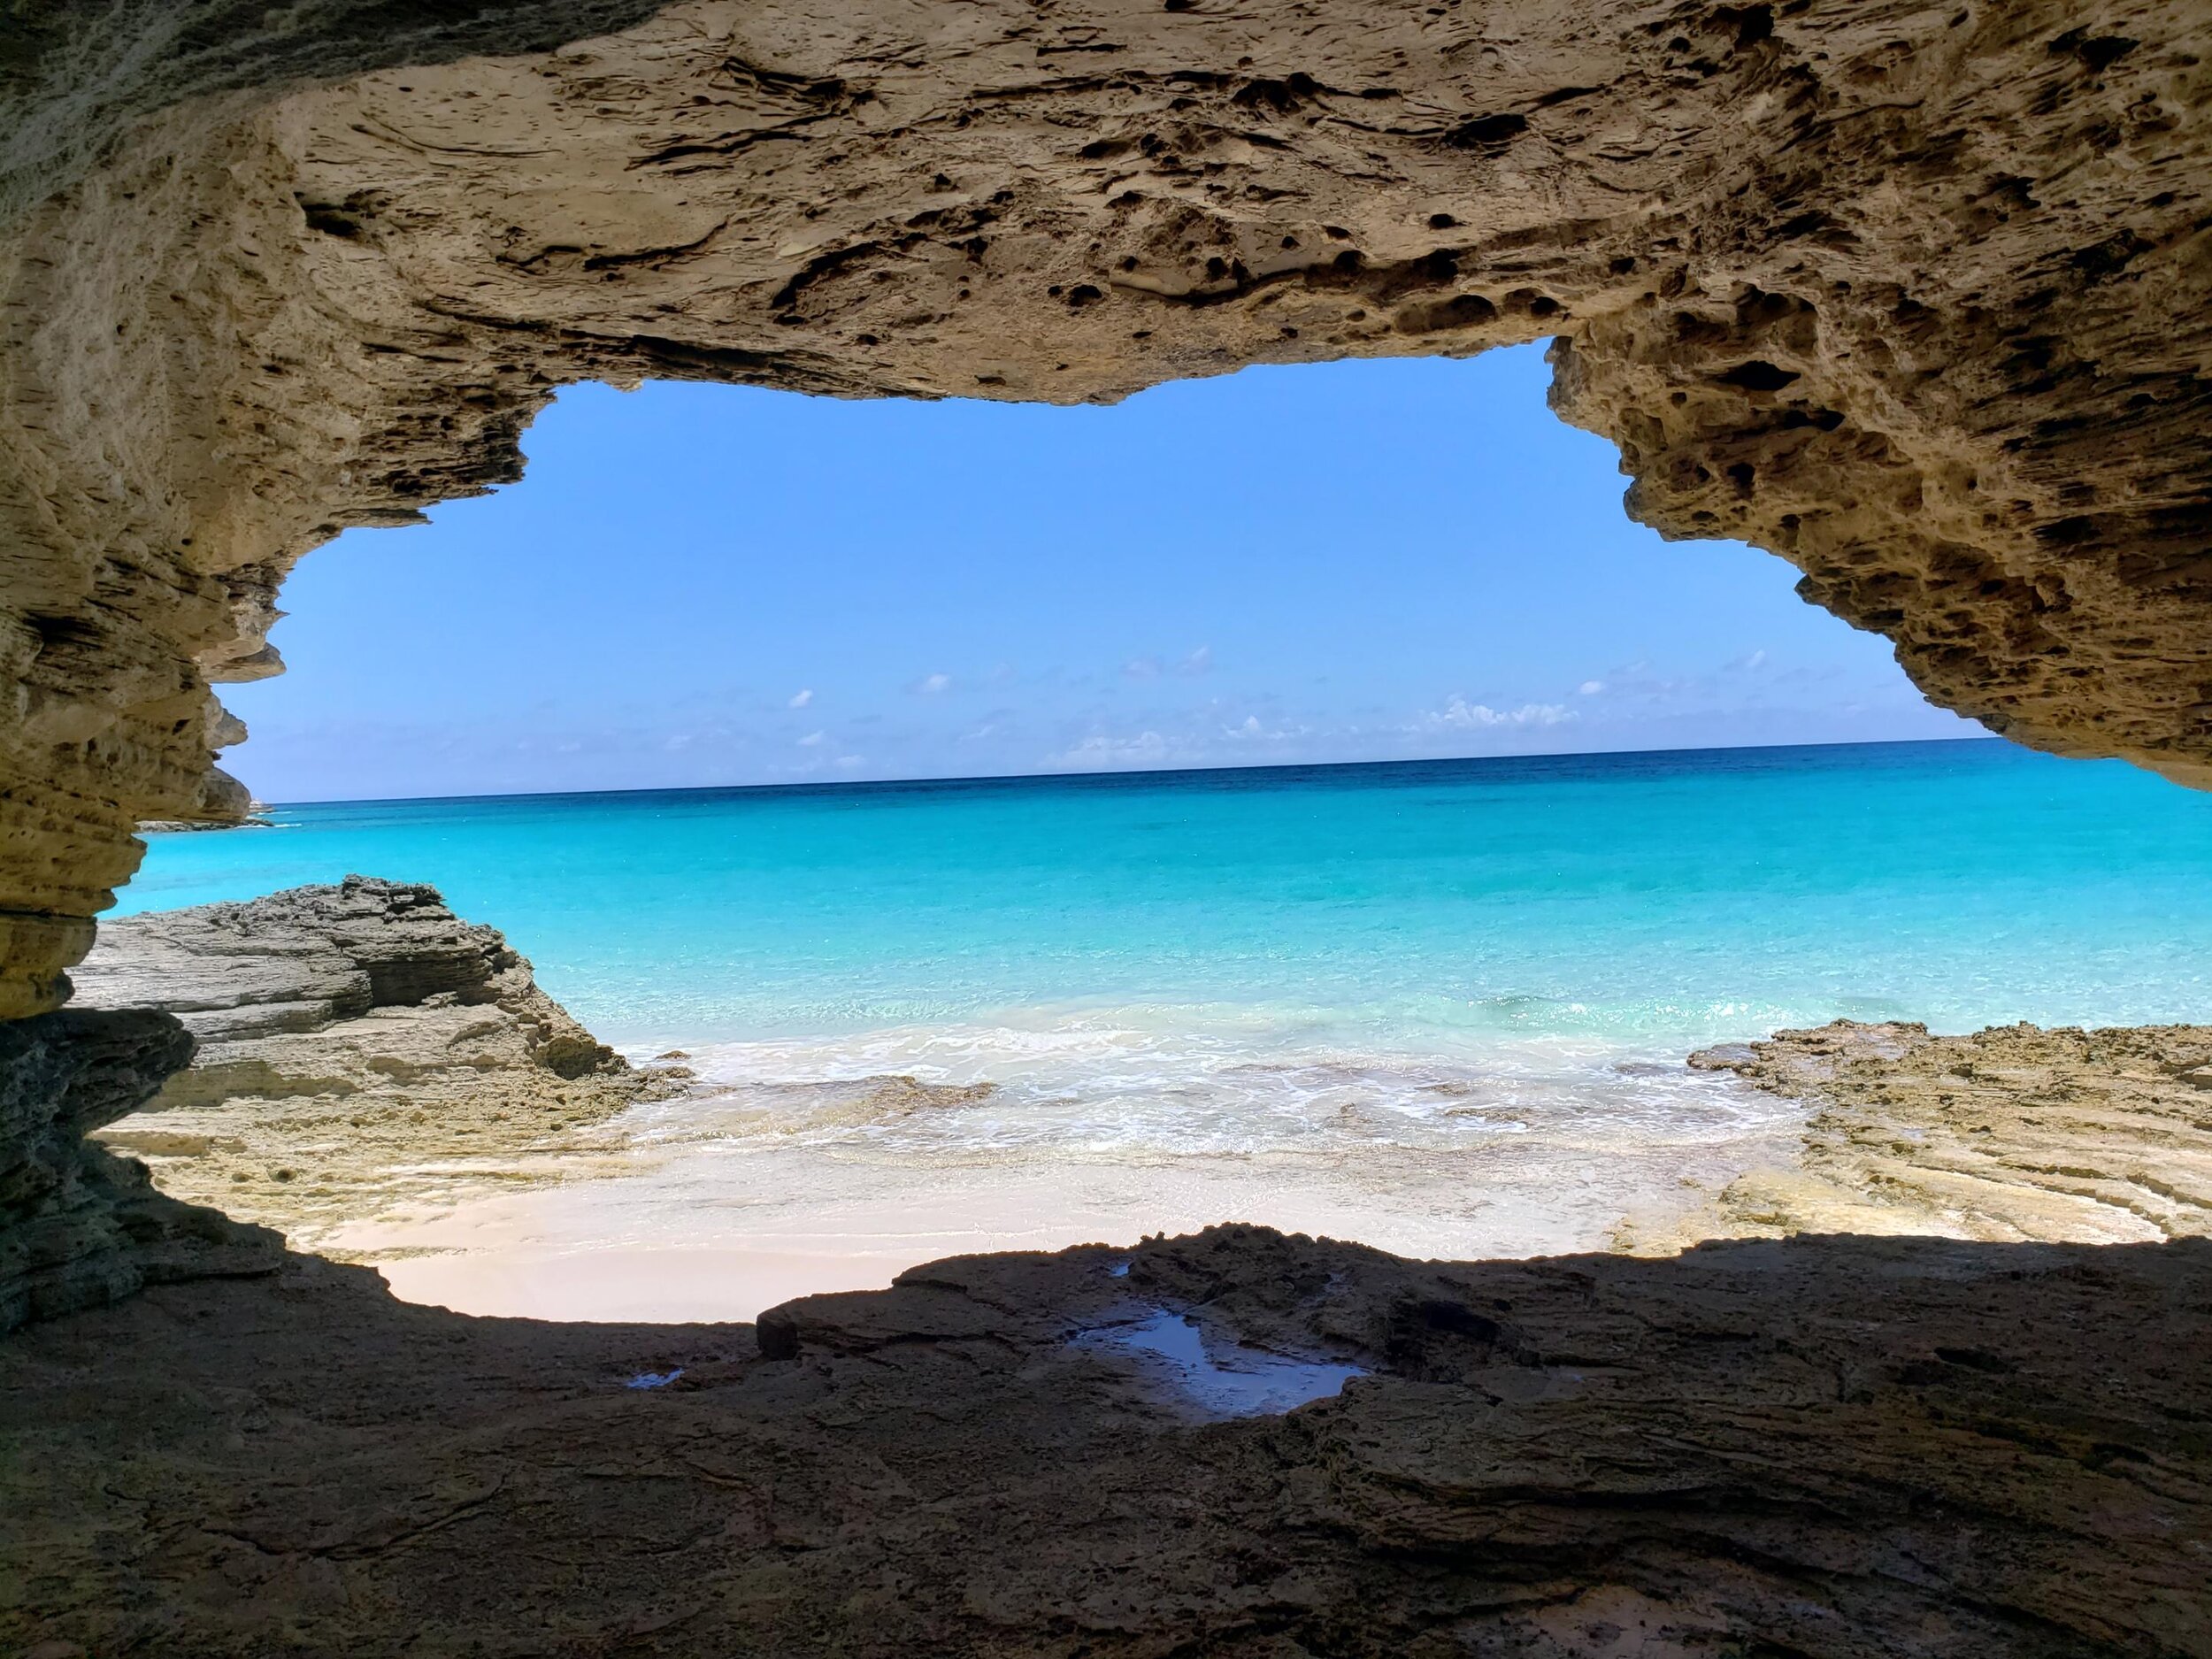
Lighthouse Point did not disappoint

This picture doesn’t even do it justice
The last few days I also found a few minutes to finally take my stand up paddle board (a 40th birthday gift from Tom and the kids) out; I absolutely love everything about paddle boarding. Then, one evening for our 6PM break we decided to go snorkeling at Kemps Creek and Tom found us an enormous cling crab for dinner.

Finally taking the paddle board out


The speared crab and our infamous van
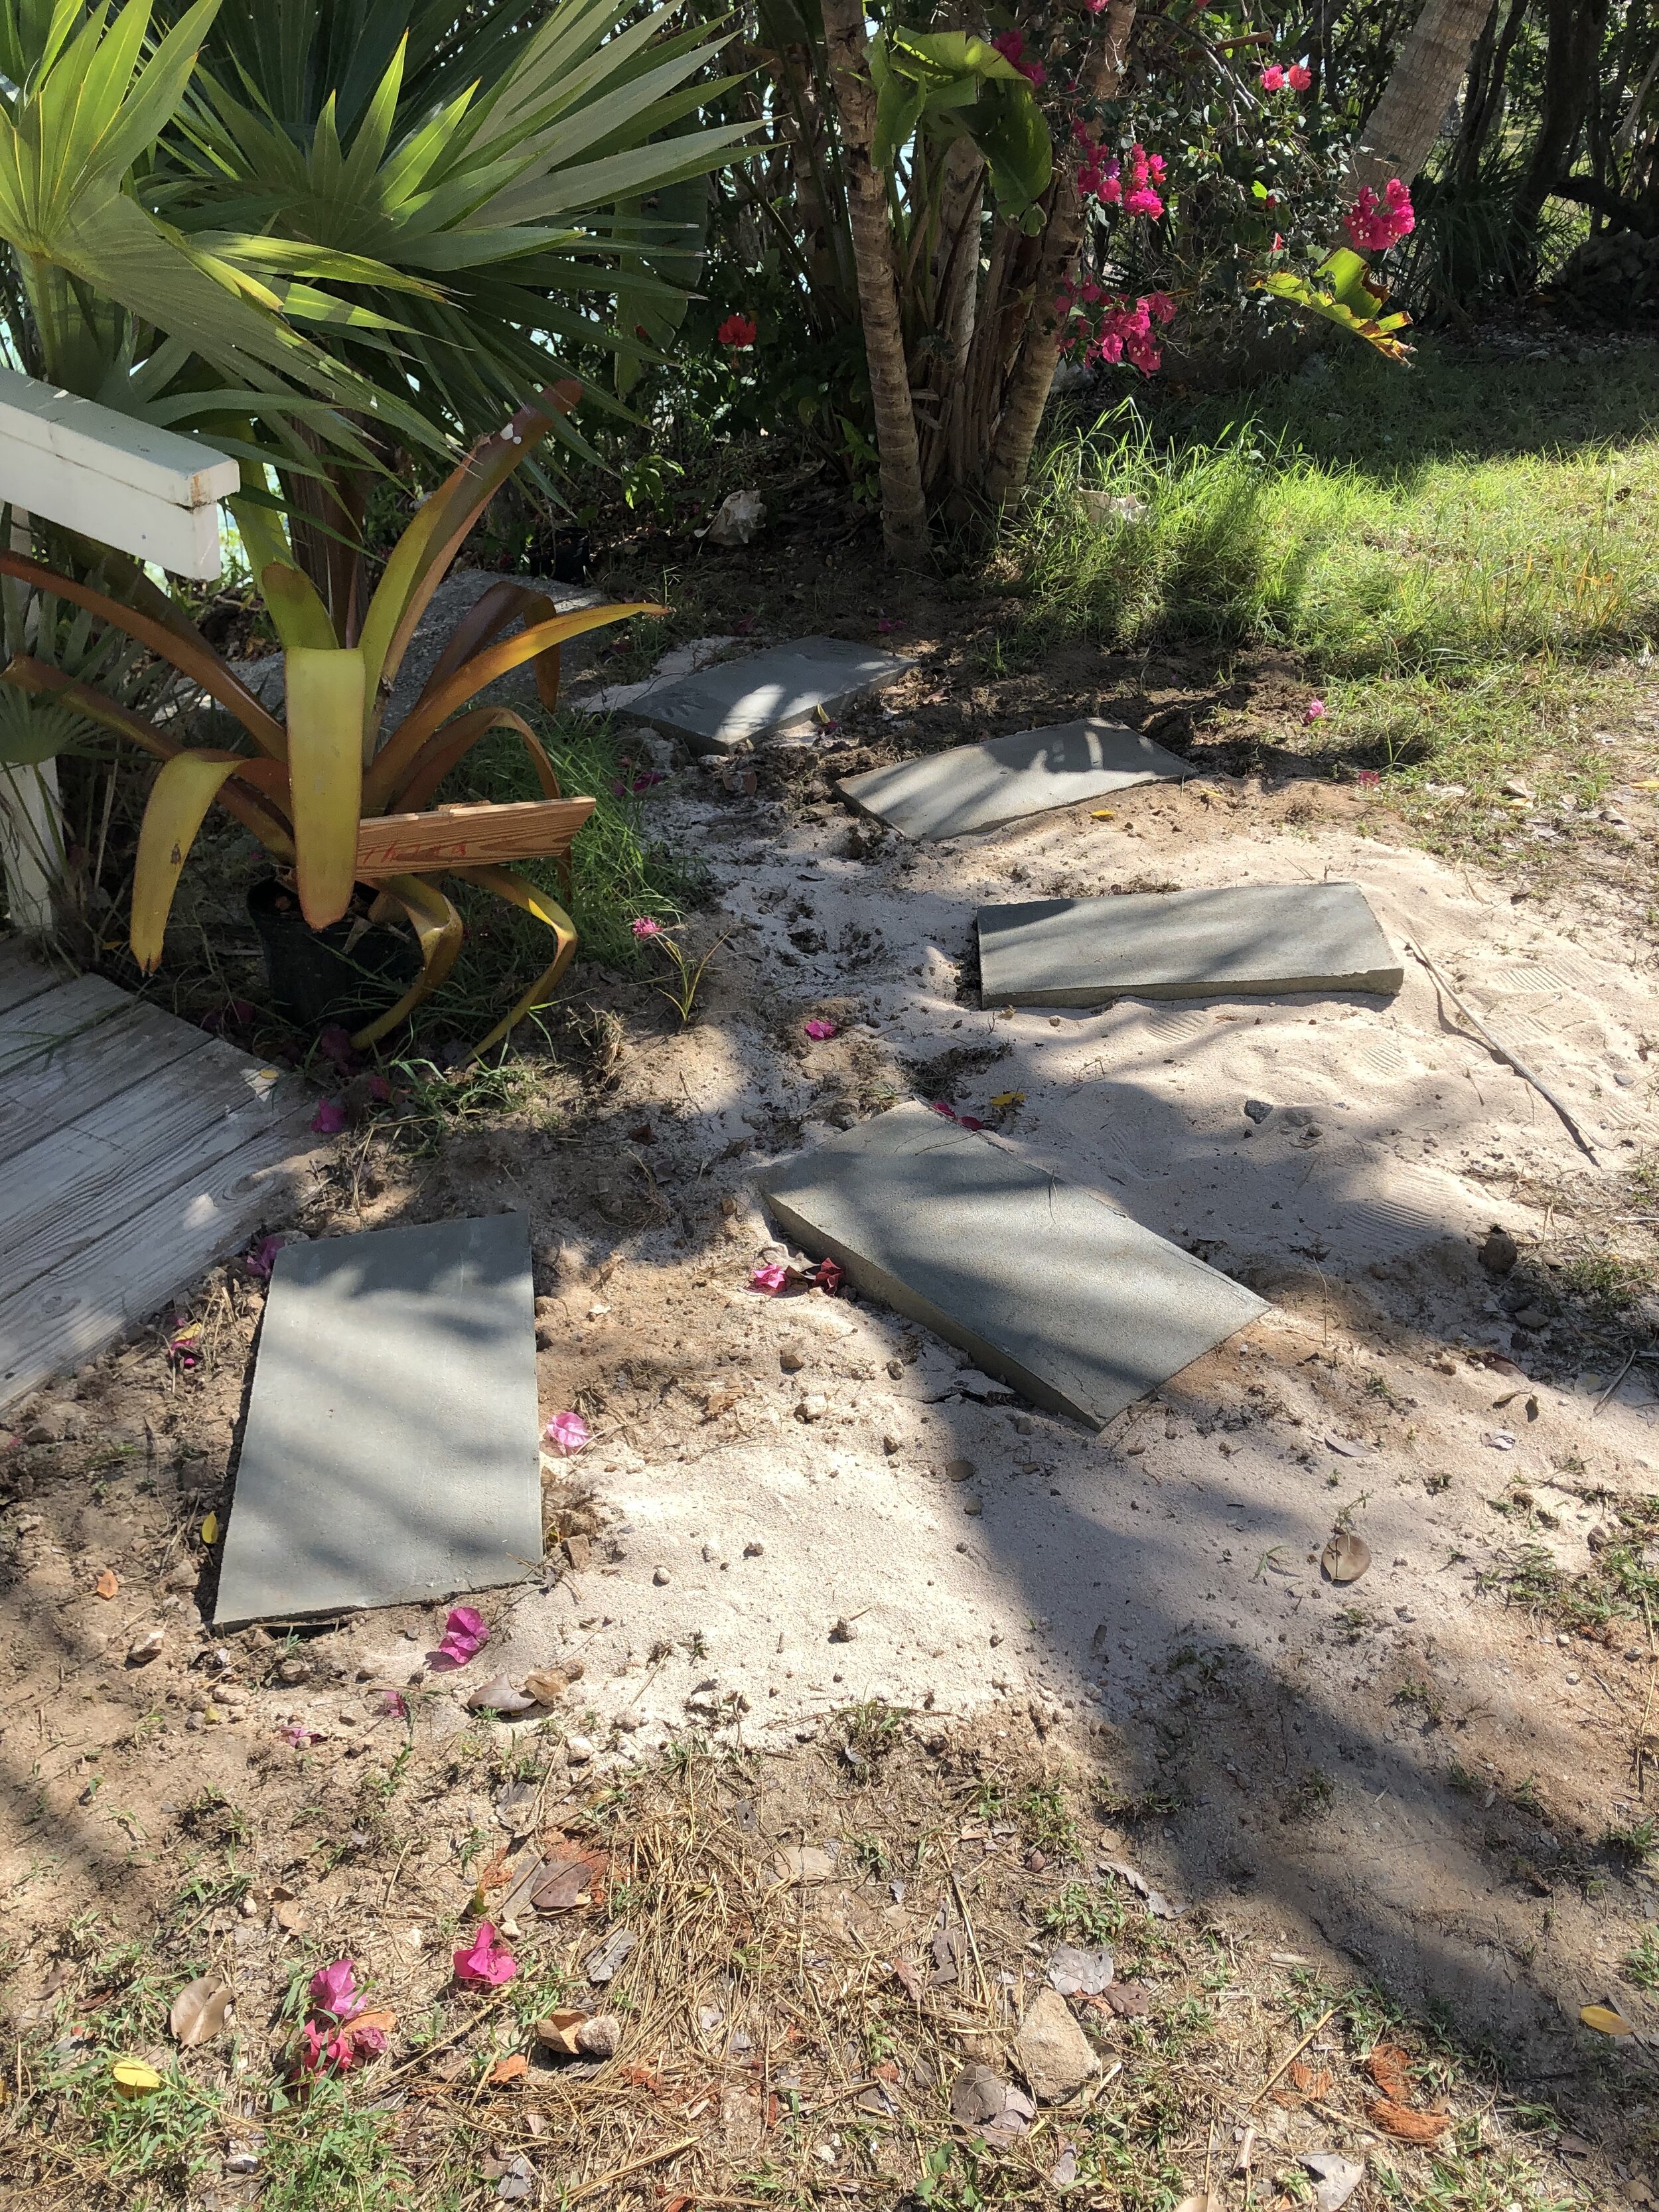
A fun project Tom added at the end was using the extra concrete to create stepping stones from the path down to the water to the front porch. There was a bunch of sand there and it would track right into the house which was driving me nuts. We let the kids put handprints in the one stone which they were pretty excited about.

Building forms for the stepping stones


We ended up completing everything we set out to do, and left just a few small projects for our next visit. Those include adding crown molding to the cabinets and installing the rest of the hardware and bathroom floors. There was literally about 2 minutes prior to our departure when all the tools were out of the house and everything was clean, so I grabbed a few quick "after” pictures.

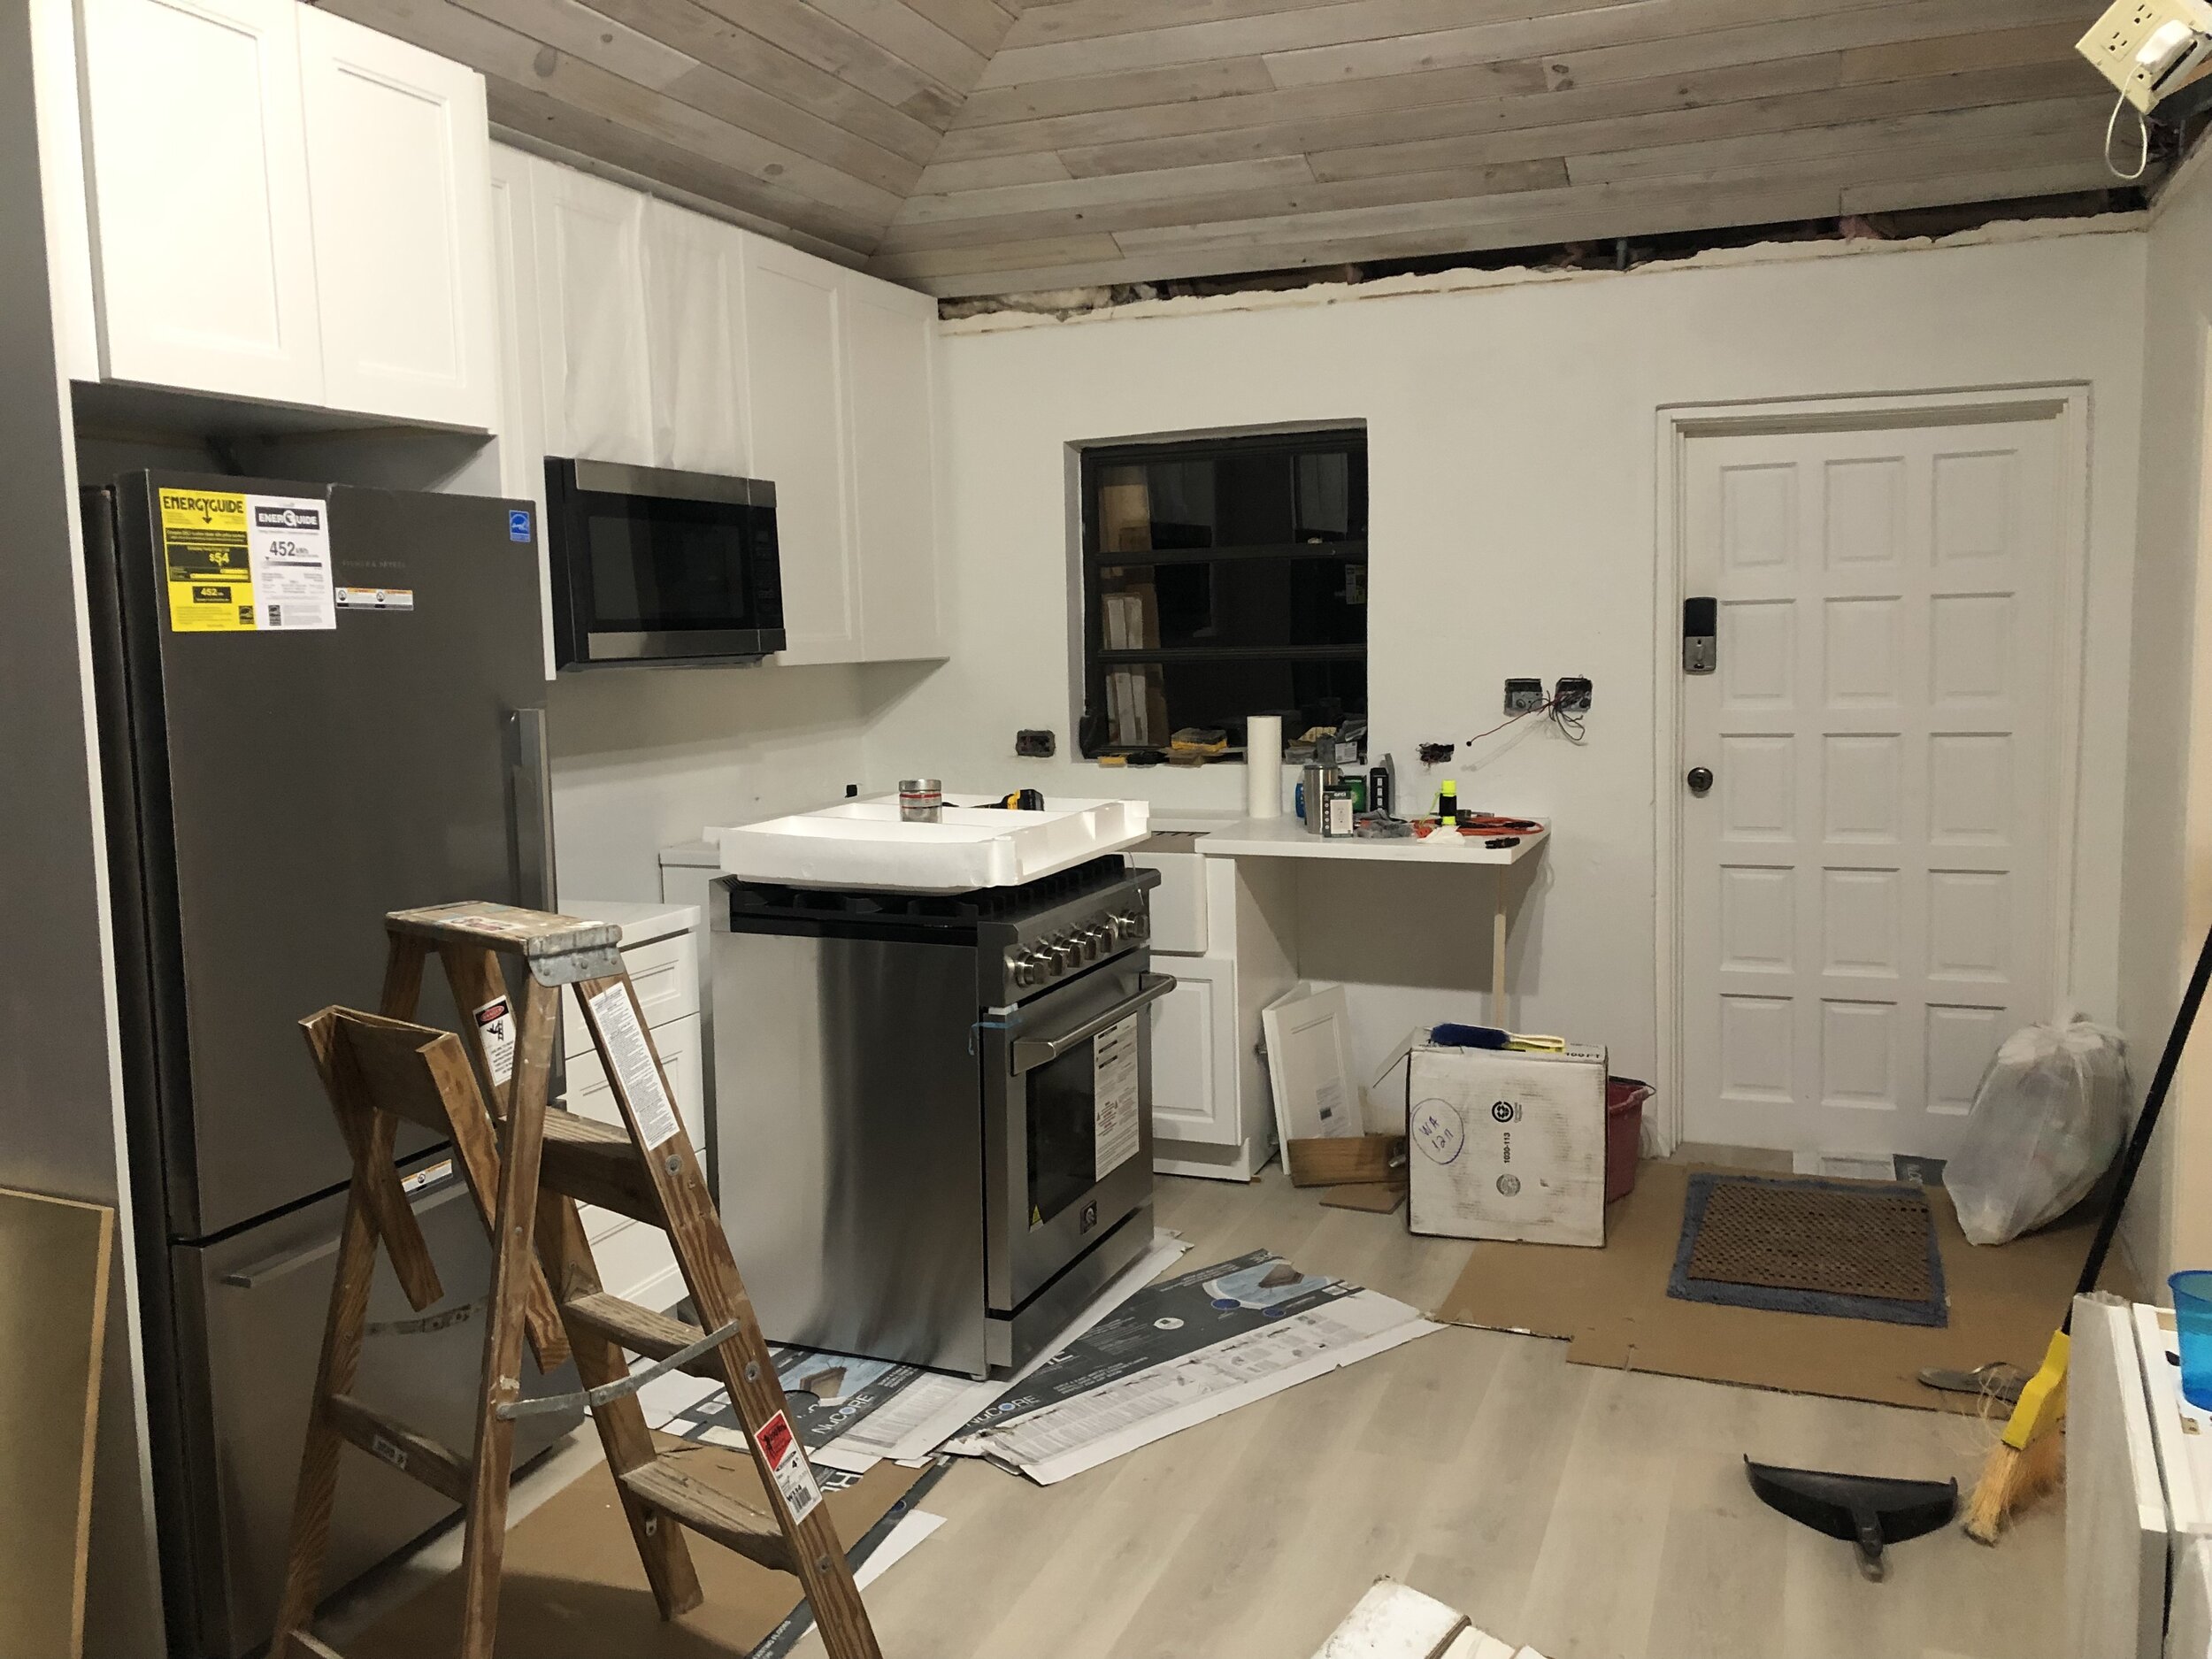
The almost finished kitchen, dining and living room

The Kitchen AFTER (minus crown molding that’s sitting on top of the cabinets and a little more hardware)
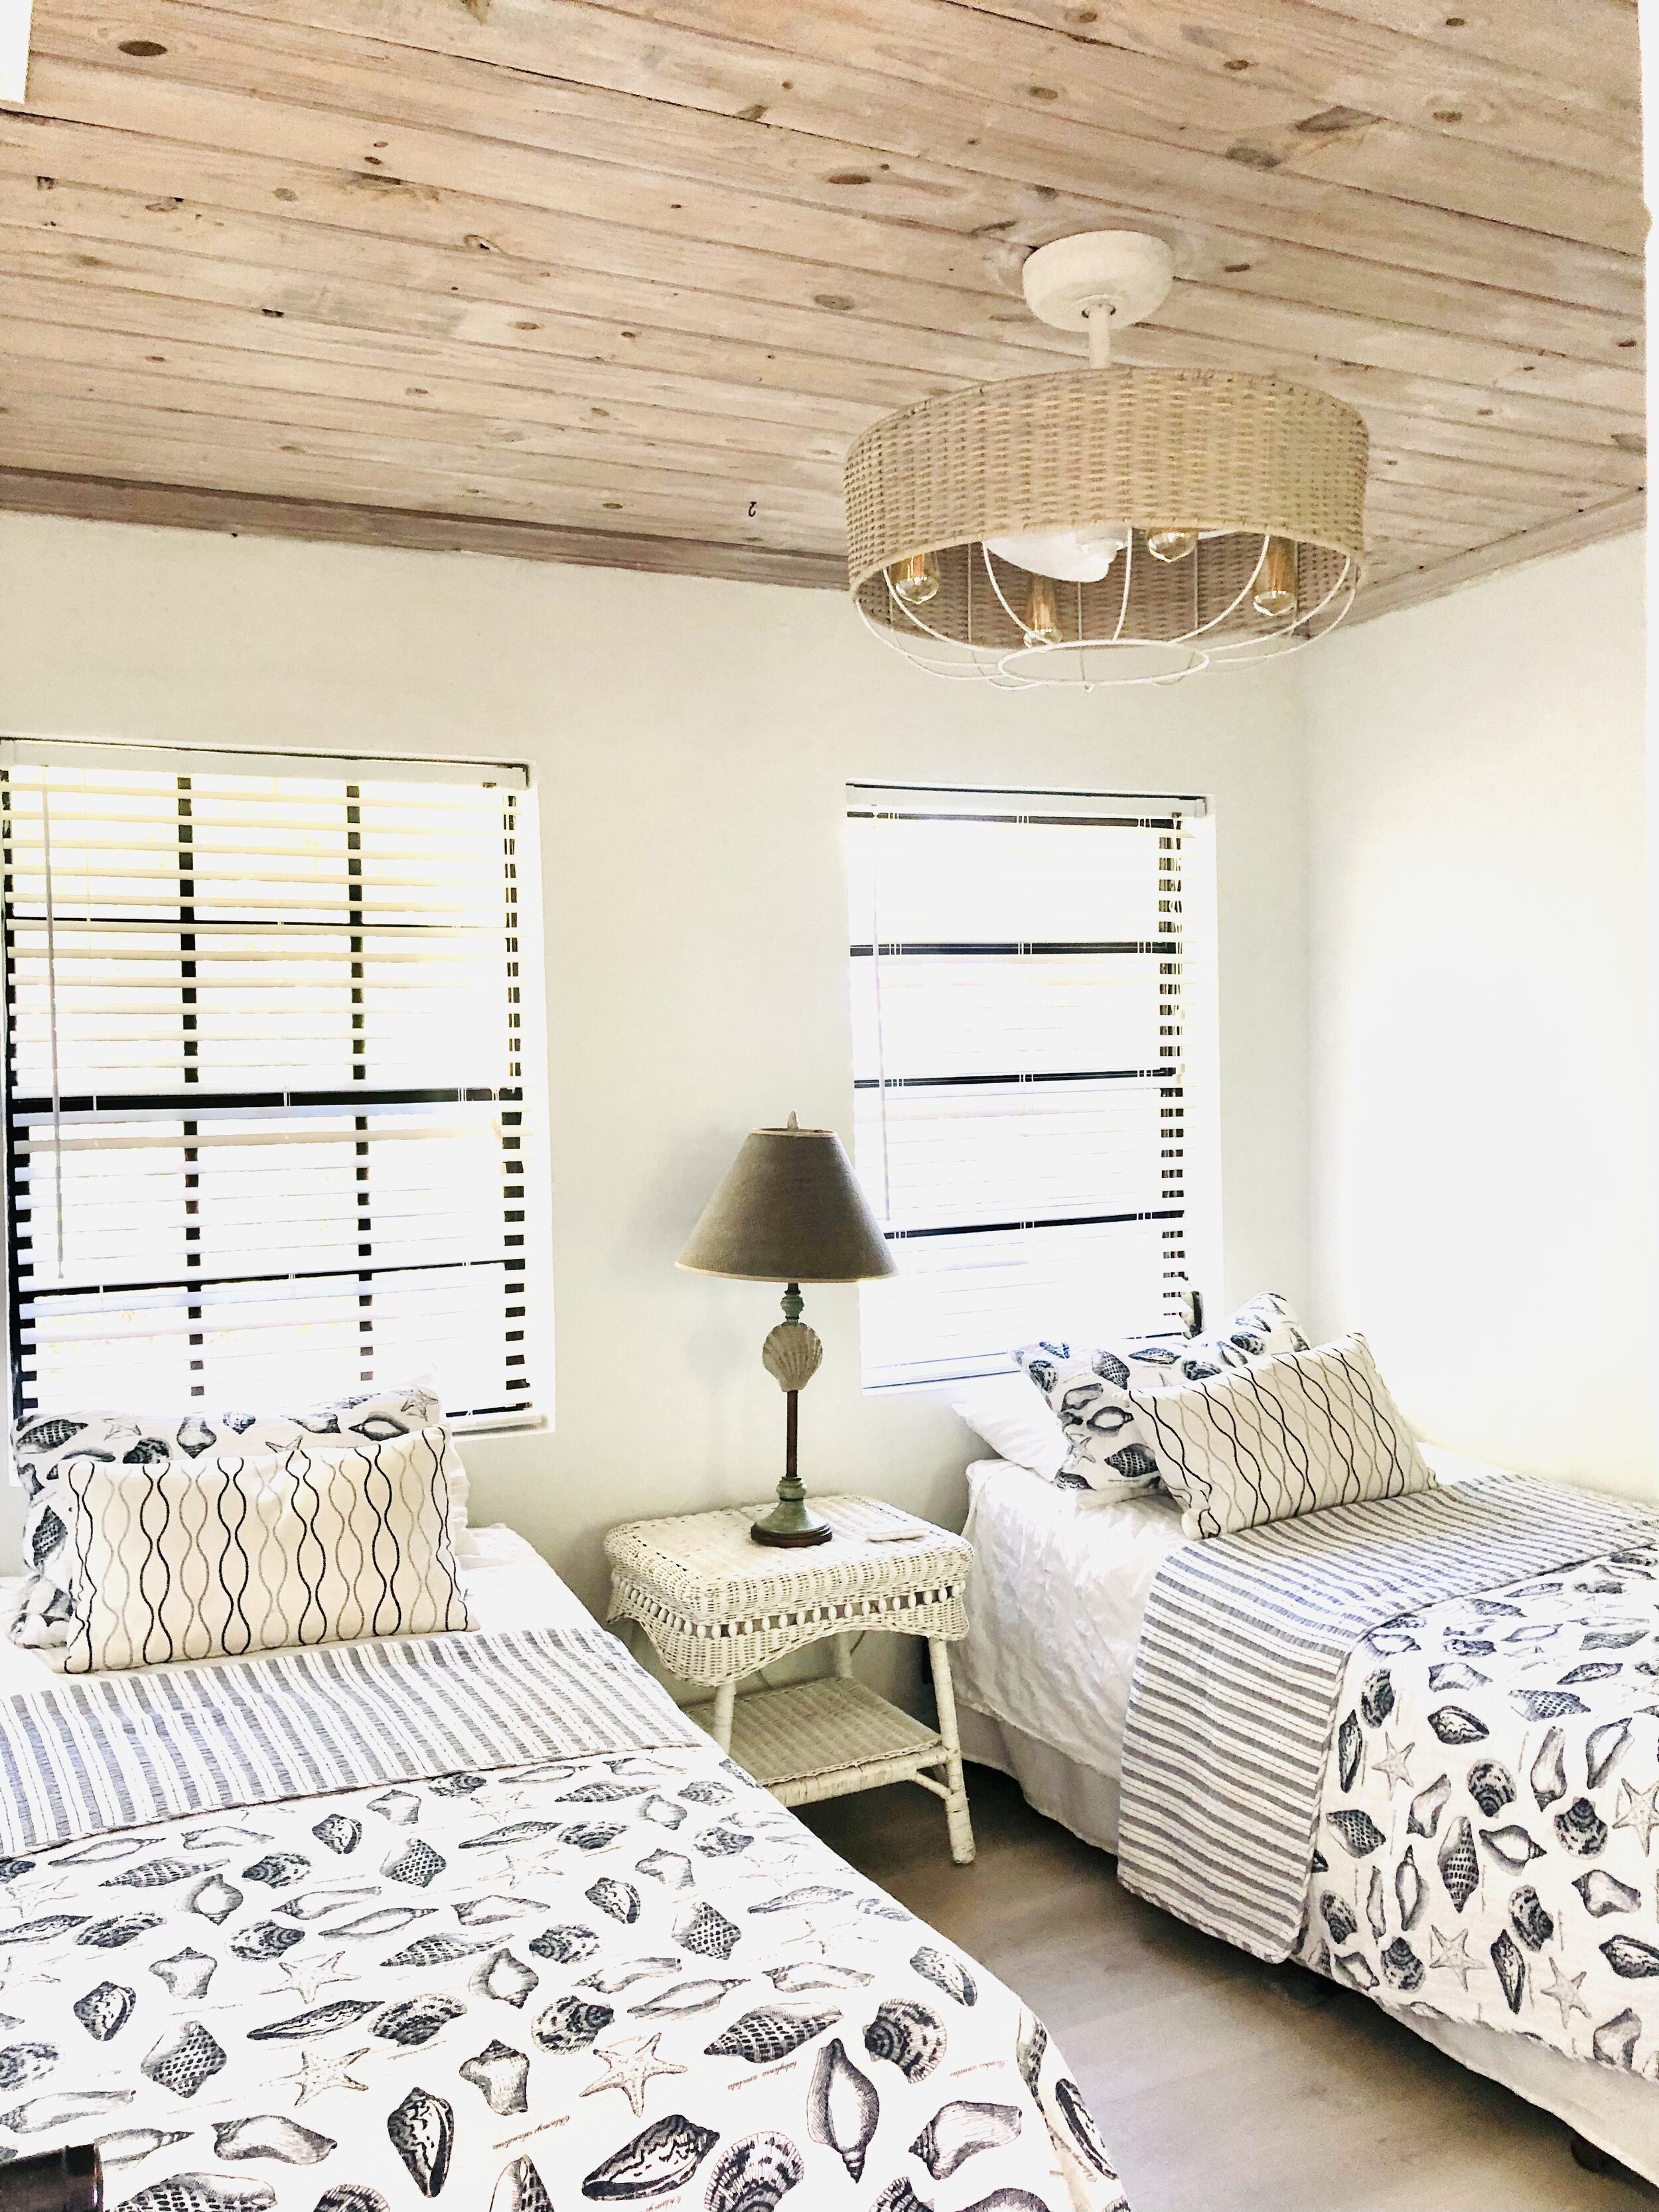
The Kids Room minus new furniture and bedding
We also plan to replace the rest of the furniture over the next few trips down and once everything is complete and furnished I’ll be sure to share more pictures. Or, if you’re so inclined, you can come visit and check it out for yourself! :) Below are very rough design boards to show the vision.


We still have a lot of projects on our wishlist with the most pressing being new windows and sliding doors, a new front door, replacing the gutters, and replacing the deck - but for now we’re looking forward to enjoying what we’ve accomplished so far.

Lots of deck to replace - but this is where we plan to spend most of our time when we’re there
Purchasing and renovating Bahama Villa has been one of the hardest, yet greatest adventures we’ve ever embarked on, but it’s safe to say Eleuthera with all of its beauty, simplicity and absolutely delightful people, has truly captured our hearts. We are so grateful to everyone that has supported us in fulfilling this dream. Very special thanks goes out to. . .
My parents for all the reasons stated above and for going outside of their comfort zones to take this adventure with us. They also took our kids for a week this summer so I could focus on getting all the materials lined up (thanks to my sister, brother and Aunt Kathy for helping with the kids while they were there).
My in-laws for watching the kids while we traveled down for the closing and to my father in law for transporting us to and from the airport at very undesirable times
Our friends the Ewing’s for also watching our kids while we closed on the house
Our Realtor Jonathan Morris for sticking with us on our multi-year search and navigating the dynamics of a dual agent with integrity
Paul Simmons Customs Brokers - Paul, Dayna and their delivery team were so patient and helpful
Tyrone Knowles for finding a vehicle for us at the last minute and for checking on the house when we’re not there
Ronald and his landscape crew and Andre the concrete contractor - these guys worked so hard and were a joy to be around
Kathy Colman - Kathy and her husband are a designer/ contractor duo on the island and she has graciously answered many questions. Her blog www.bestofeleuthera.com was the one thing that kept me inspired when this whole process seemed impossible.
Last, but certainly not least, thank you to my amazing husband who has worked tirelessly to make this dream come true. He is hands down, the hardest working person I’ve ever known. I’m grateful I found a partner in life that loves to think up dreams as crazy as mine.

If you’ve read this far, I’m super impressed! Thank you for following along!
XO
ali